Summer’s golden rays can transform your backyard into a sweltering oasis, but that doesn’t mean you have to retreat indoors. Whether you’re just beginning your outdoor living journey or have years of experience under your tool belt, creating a shady retreat is easier and more rewarding than you might think. With a bit of creativity and some DIY spirit, you can craft your very own outdoor shade structures that blend functionality with personal style, keeping you cool and comfortable even in the hottest months.
In this guide, we’ll explore ten innovative DIY shade solutions that cater to every skill level and budget. From simple canopies to more elaborate pergolas, each project is designed to inspire and equip you with the confidence to enhance your outdoor space. Get ready to discover practical tips and detailed insights that will help you transform your patio into a cherished sanctuary, offering relief from the heat while adding charm and character to your home.
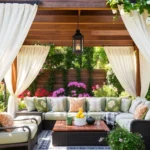
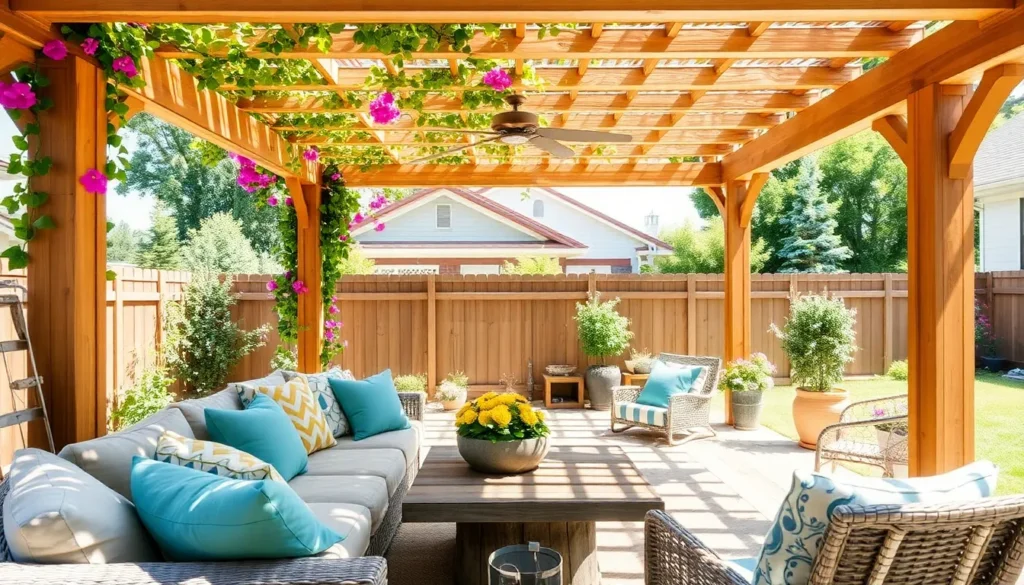
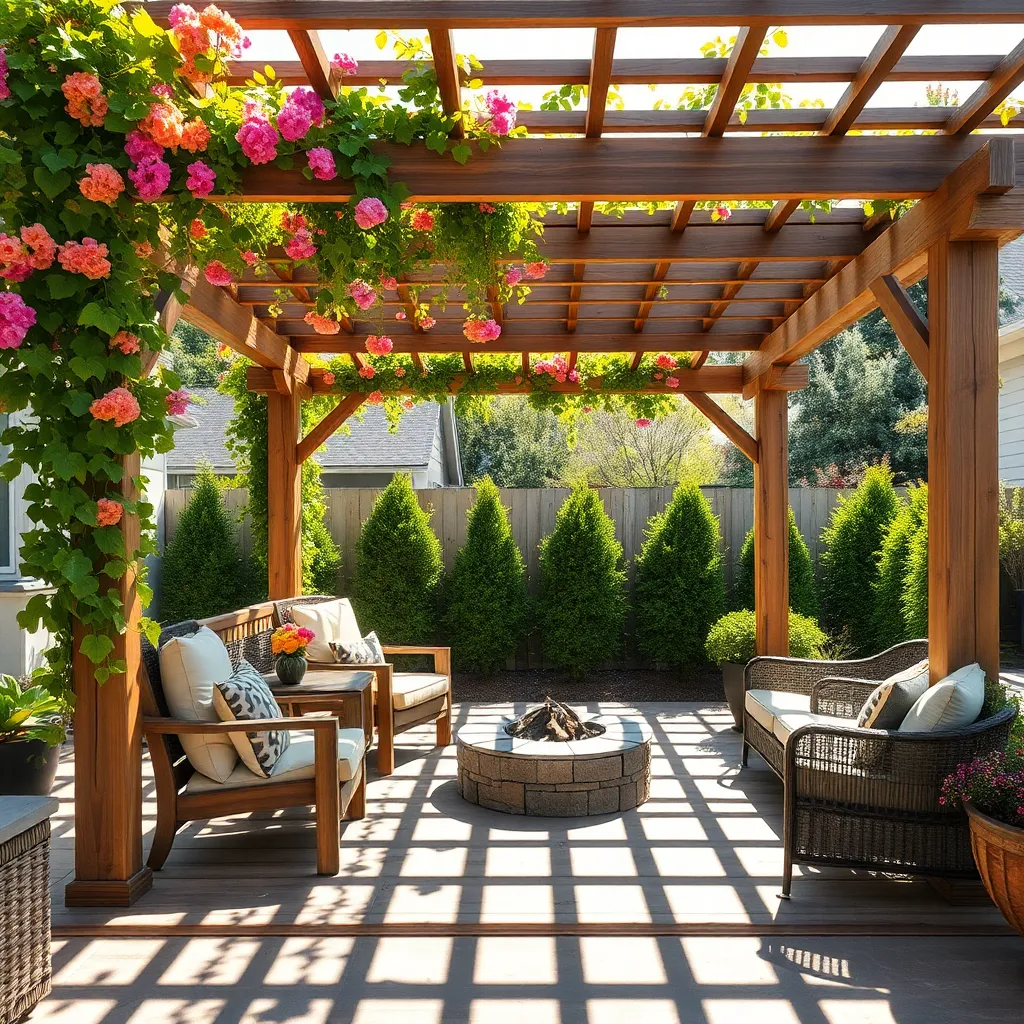
Designing Your Own Pergola Oasis
Creating your own pergola oasis can transform your backyard into a stylish retreat, providing both shade and charm. Begin with selecting the right materials: consider durable woods like cedar or redwood that resist weathering, or opt for metal for a sleek, modern look. Ensure your pergola dimensions suit your space; a typical design might be around 10×10 feet, but adjust based on your area and needs. For a touch of elegance and extra shade, add climbing plants like wisteria or grapevines, which can weave through the lattice and create a lush canopy.
When it comes to construction, using pre-fabricated kits can simplify the process for beginners, while experienced DIYers might enjoy the challenge of a custom build. Anchor your pergola securely with concrete footings for stability, especially in windy areas. Consider adding features like retractable canopies or string lights for ambiance and versatility.
- Start with a strong foundation by digging deep post holes and using steel brackets.
- Assemble the frame and crossbeams, ensuring everything is level.
- Finally, enhance the space underneath with comfortable furniture to create a cozy escape.
With these steps, your pergola will be both functional and a statement piece in your outdoor sanctuary.
Building a Budget-Friendly Sun Sail
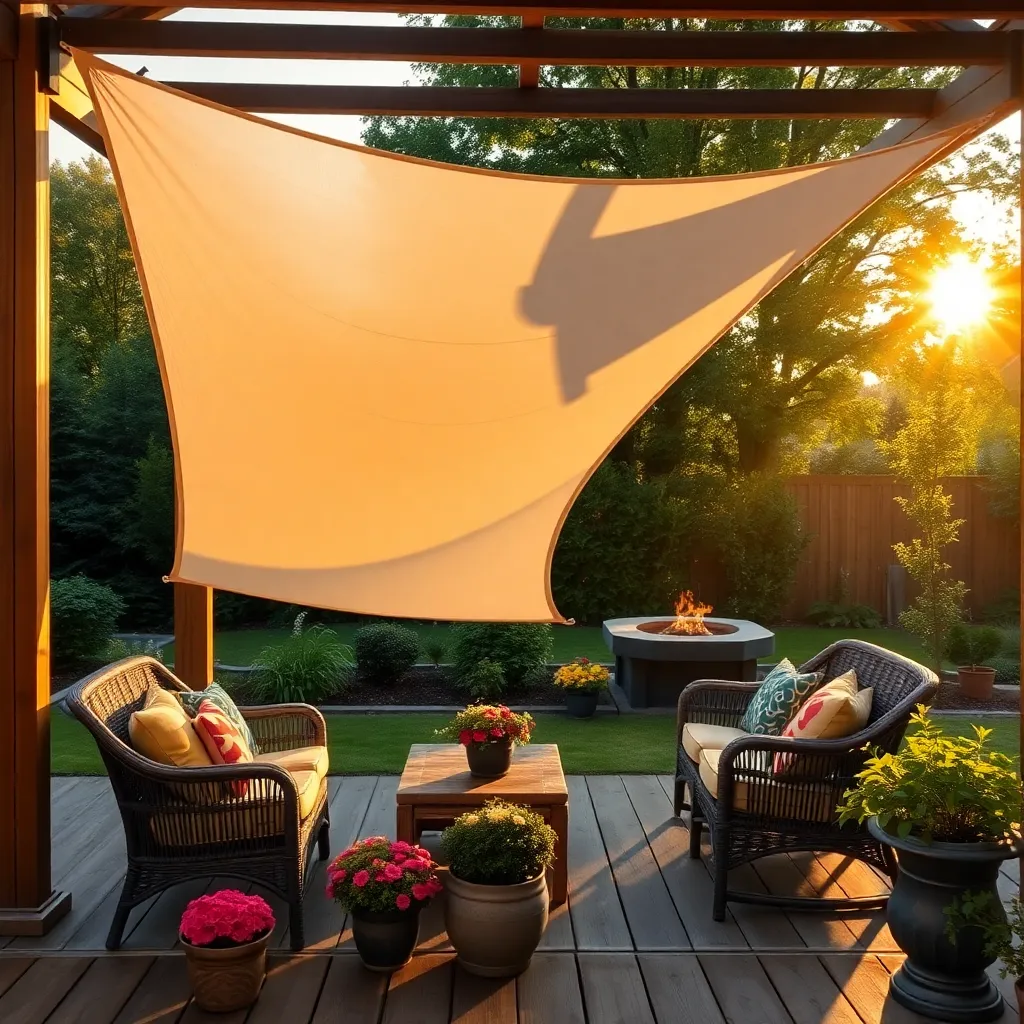
For a simple, budget-friendly outdoor shade solution, consider installing a sun sail. These versatile structures are not only cost-effective but also easy to set up. Begin by selecting a high-quality, UV-resistant fabric—such as polyethylene—which ensures durability and protection from harsh sunlight. Choose a triangular or rectangular design depending on your space, and plan for dimensions that suit your area, typically around 12×12 feet for a small patio. Anchor points are crucial; use sturdy posts, trees, or the side of your house to secure the sail with durable hardware like turnbuckles and carabiners.
Before installation, map out the sun’s path to optimize shade coverage at peak sun hours. Advanced DIYers can enhance stability by using concrete footings for the posts or adding adjustable tensioners to maintain tautness in changing weather. Consider color and style to complement your existing outdoor decor, choosing neutral tones for a classic look or vibrant hues for a splash of color. With these steps, even beginners can create a comfortable, shaded retreat to enjoy the outdoors all summer long.
Crafting a Rustic Bamboo Canopy
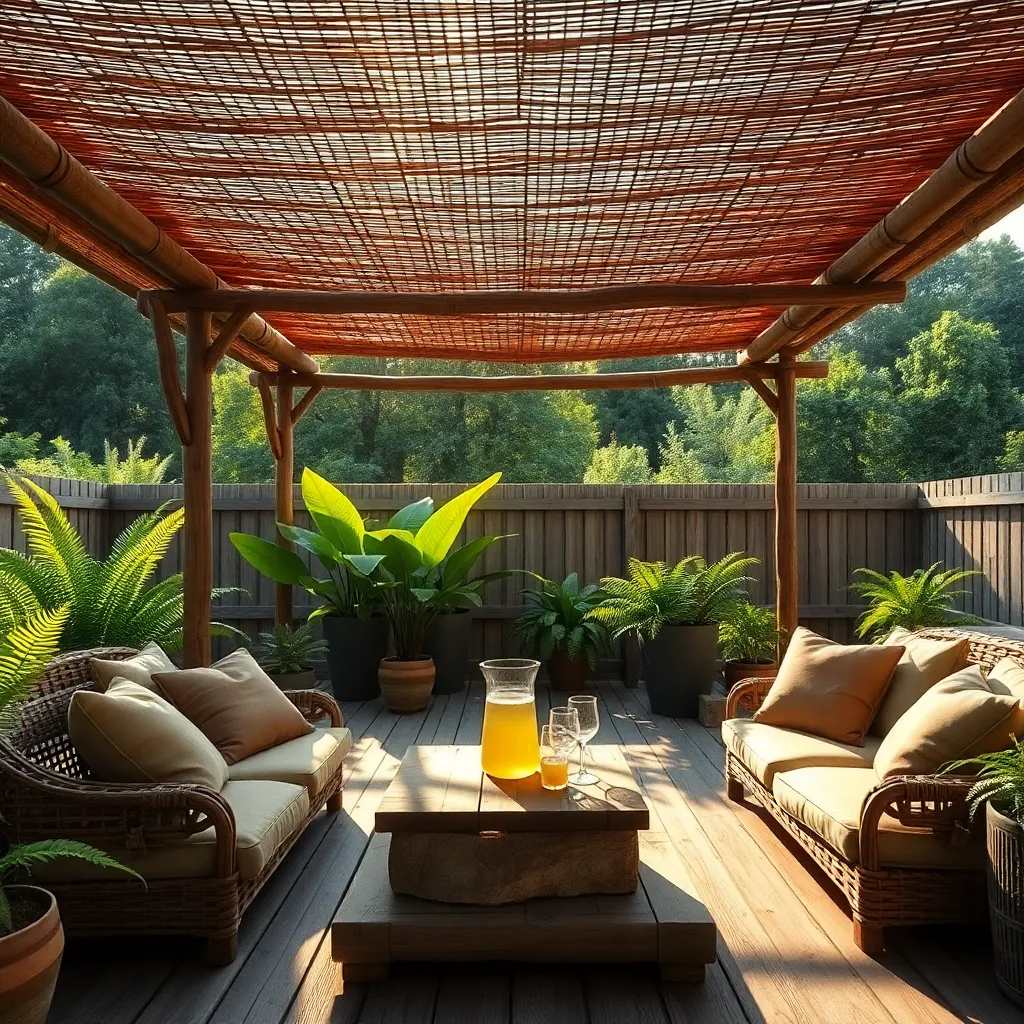
For a truly rustic and natural addition to your outdoor space, consider crafting a bamboo canopy. Start by sourcing sturdy bamboo poles, ideally around 2-3 inches in diameter, which are perfect for the frame. Arrange them in a simple square or rectangular shape, with each pole cut to a uniform length of about 8 feet for a standard canopy. Secure the corners using natural jute twine or rope for an authentic touch, ensuring the structure is solid and stable.
To create the canopy’s top, weave together a series of lightweight bamboo slats or use a durable outdoor fabric that complements your garden’s aesthetics. Attach the slats or fabric using zip ties or galvanized nails, ensuring they’re evenly spaced to provide adequate shade while allowing gentle breezes to pass through. For an advanced touch, consider adding decorative elements like hanging planters or string lights along the edges for ambiance and additional appeal.
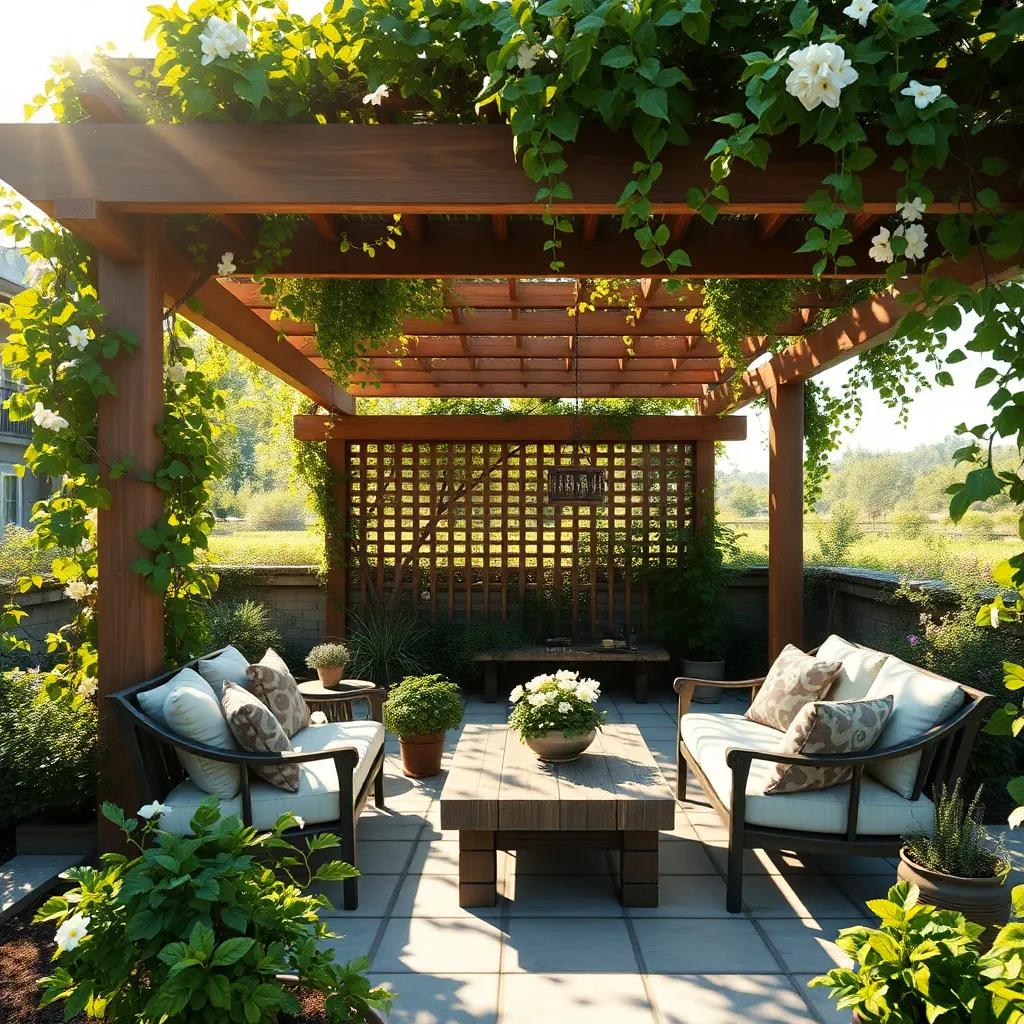
Constructing a Wooden Trellis Retreat
Transform your backyard into a serene escape by constructing a wooden trellis retreat. Start by selecting durable, weather-resistant wood like cedar or redwood, which not only offers longevity but also a natural aesthetic. For a beginner-friendly design, use 2×4-inch lumber for the frame and ensure the trellis is at least 8 feet tall to provide ample shade and privacy. For added stability, anchor the structure using concrete footings. Consider incorporating climbing plants such as clematis or jasmine to enhance the retreat with natural beauty and fragrance.
Experienced DIYers can add depth and character by designing a slatted roof or incorporating lattice panels for a more intricate look. To maximize your outdoor experience, include comfortable seating beneath the trellis—opt for weather-resistant cushions and a small table for added functionality. Seal the wood with a clear or tinted outdoor sealant to protect against harsh weather conditions and prolong the life of your structure. By blending practicality with creativity, your wooden trellis retreat will become a favorite spot for relaxation during hot summer days.
Installing a Retractable Awning System
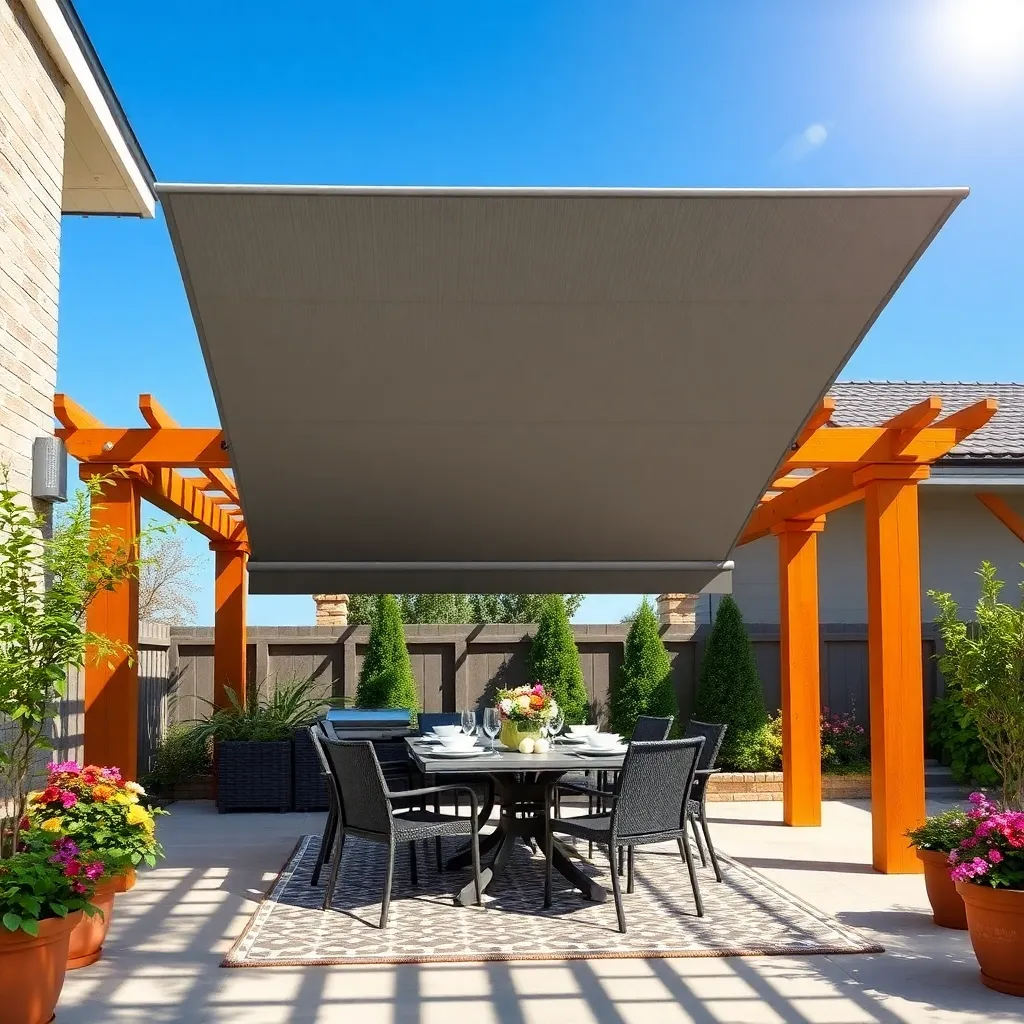
To create a versatile outdoor space, consider installing a retractable awning system. This option provides the flexibility to enjoy the sun or seek shade as desired. Start by selecting an awning that fits your patio or deck dimensions, typically ranging from 8 to 20 feet wide. Choose materials like acrylic canvas for durability against various weather conditions. For beginners, opt for manual systems, which are easier to install, while motorized systems offer advanced convenience with remote control operation.
Before installation, ensure your wall structure can support the awning’s weight. Use a level and measuring tape to mark precise drilling points for the brackets. For enhanced stability, consider using lag bolts if mounting on wooden surfaces. Experienced DIYers can add weather sensors to automatically retract the awning during high winds or rain. Regular maintenance, such as cleaning with mild soap and water, will extend the life of your awning, making it a valuable addition to your outdoor retreat.
Creating a Lush Greenery Shade Wall
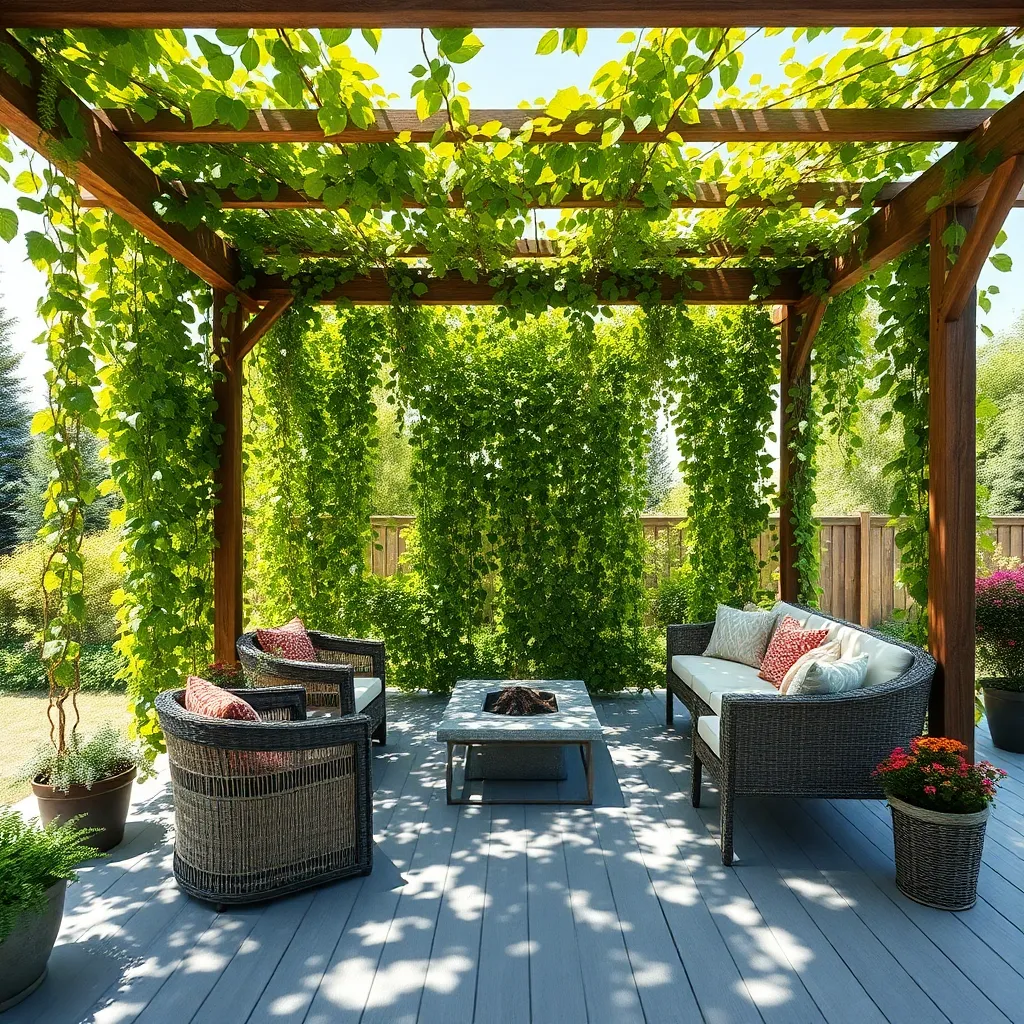
A lush greenery shade wall is a visually appealing way to create a cool, shaded area in your outdoor space. Start by selecting a sturdy support structure, such as a trellis, pergola, or a series of wooden posts connected by horizontal beams. Choose fast-growing climbing plants like ivy, wisteria, or climbing roses, which not only provide shade but also enhance the aesthetic appeal of your garden. For beginners, consider installing a pre-made lattice panel, while more advanced DIY enthusiasts might construct a custom framework to suit specific dimensions.
Position your shade wall strategically to block the harsh afternoon sun, ideally on the west-facing side of your patio or garden. Ensure proper plant spacing to allow adequate air circulation and prevent disease. Regular pruning is essential to maintain the shape and density of the greenery. Watering systems, such as drip irrigation, can be added for convenience and to ensure consistent moisture levels. By integrating a lush greenery shade wall, you’ll create a refreshing retreat and contribute to a sustainable environment.
Making a Versatile Pop-Up Gazebo
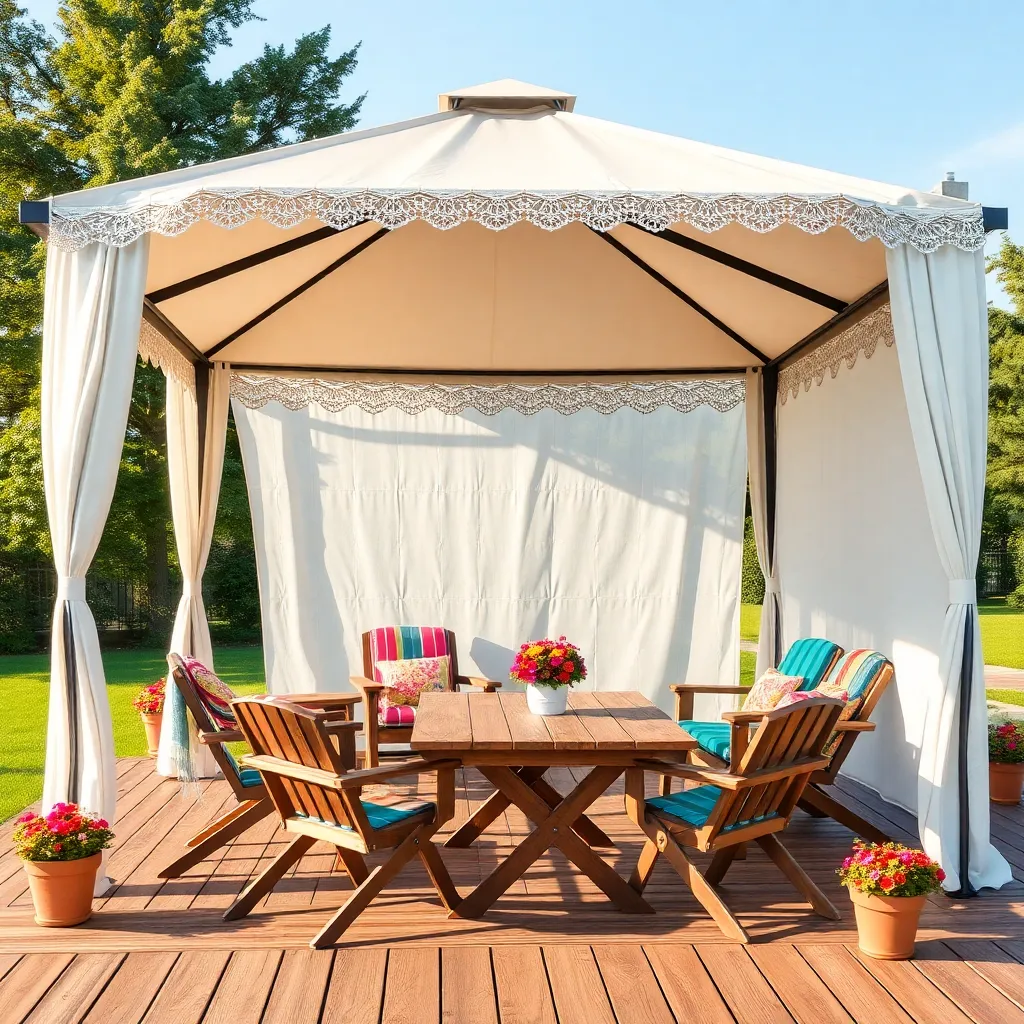
Transform your outdoor space with a versatile pop-up gazebo that’s perfect for any summer gathering. Start with a sturdy, collapsible frame—usually made from lightweight but durable materials like aluminum or steel. Look for a gazebo with a weather-resistant canopy; polyester is a popular choice due to its UV protection and water-repellent properties. Ensure your gazebo is easy to assemble and transport by selecting one with features like telescopic legs and a simple locking mechanism. Consider adding side panels for extra shade and privacy, which can be secured in place with Velcro or zippers.
For those looking to customize their gazebo, enhance it with string lights or lanterns hung from the canopy frame for evening ambiance. Anchor the structure securely using weighted bags or stakes to withstand breezy conditions. If you’re ready to take it up a notch, incorporate a retractable shade or adjustable awning to control the sunlight exposure throughout the day.
- Tip: Choose a neutral color for the canopy to blend seamlessly with any outdoor decor.
- Advanced Tip: Sew pockets into the canopy edges to add weighted rods for better wind resistance.
With these features, your pop-up gazebo will be a stylish and functional addition to your backyard.
Assembling a Portable Parasol Haven
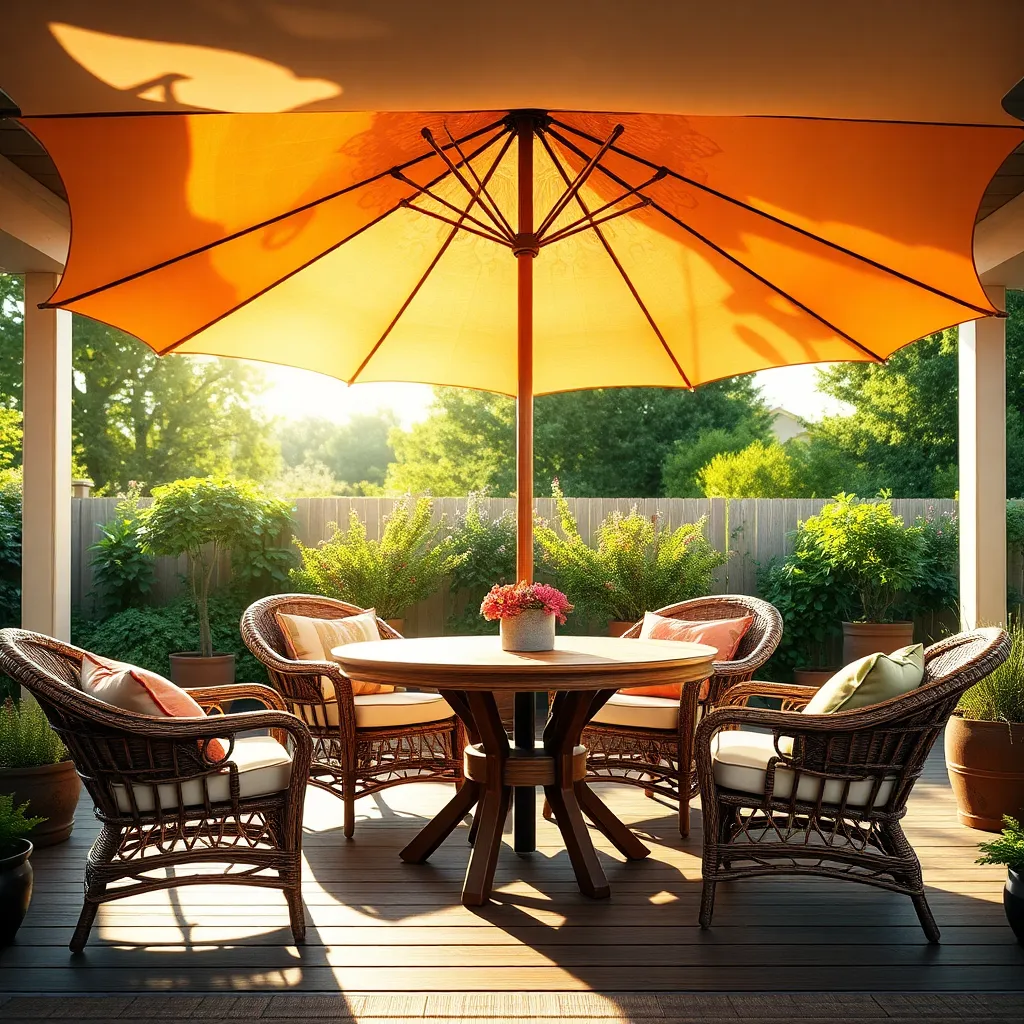
Creating a portable parasol haven is an excellent way to add flexible shade to your outdoor space. Start by choosing a sturdy, weather-resistant parasol with a UV-protective canopy, ideally with a diameter of at least 9 feet for ample coverage. Select a base that is heavy enough to withstand wind but portable, such as one with wheels or a collapsible design. For a touch of personalization, consider parasols with adjustable tilting mechanisms to adapt to the sun’s movement throughout the day.
Enhancing this setup can be as simple as adding a few thoughtful design elements.
- Consider using outdoor rugs or mats to define the parasol area and create a cozy nook.
- Incorporate comfortable, weatherproof seating like foldable chairs or lounge cushions for added comfort.
For a more advanced touch, hang solar-powered string lights or attach a clip-on fan to the parasol pole to keep the area cool and inviting after sunset. By thoughtfully combining these elements, you can transform a basic parasol into a charming, portable retreat perfect for any summer day.
Fabricating an Eco-Friendly Tarp Shelter
Creating an eco-friendly tarp shelter is a wonderful way to provide shade while being kind to the environment. Start with a durable, sustainable tarp made from recycled materials or natural fibers, like hemp. Use sturdy poles or bamboo stakes, ensuring they are securely anchored to withstand wind. For a simple design, consider an A-frame structure by draping the tarp over a ridge line and securing the corners with ropes and stakes, allowing for easy setup and takedown.
To enhance the shelter’s sustainability, incorporate natural elements like a living green wall on one side for added shade and aesthetics. Use native climbing plants that thrive in your climate to create an ever-changing backdrop. Beginners should focus on mastering basic knots and tensioning techniques for stability, while advanced enthusiasts might experiment with adjustable heights or angles to optimize sun protection throughout the day. Remember, the key to a successful eco-friendly tarp shelter is combining functionality with minimal environmental impact.
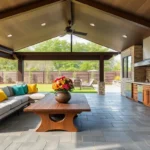
Designing a Customizable Fabric Pavilion
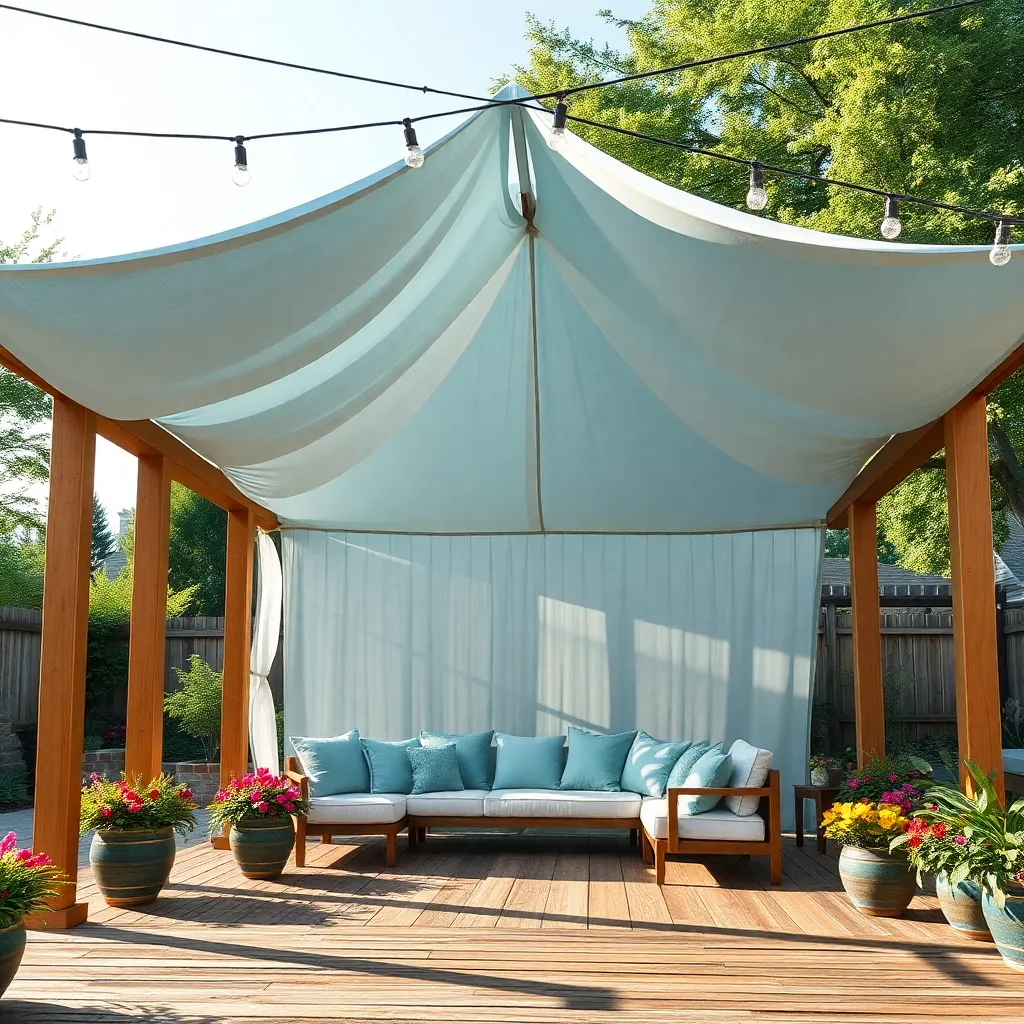
Creating a customizable fabric pavilion is a brilliant way to add both style and function to your outdoor space. Begin with a sturdy frame made from materials like galvanized steel or treated wood to ensure durability against the elements. The pavilion’s fabric cover can be tailored to match your aesthetic preferences, with options ranging from weather-resistant polyester to breathable canvas. For a touch of versatility, consider installing adjustable side panels to provide shade or privacy as needed. This feature not only makes the space more comfortable but also extends its usability throughout the year.
For a seamless build, ensure that your pavilion measurements are precise—most homeowners find a 10×10-foot structure offers ample space for seating and dining without overwhelming a typical backyard. Use strong, UV-resistant ties or clips to secure the fabric to the frame, allowing for easy removal and cleaning. Advanced designers might explore adding solar-powered lights or retractable awnings for added functionality and ambiance. Remember, the key to a successful fabric pavilion is in the details, so take the time to plan your design and choose quality materials for a structure that will enhance your outdoor living area for years to come.
Conclusion: Creating Beautiful Outdoor Spaces
As we journey through the creative world of DIY outdoor shade structures, each idea not only provides relief from the scorching summer sun but also serves as a symbol of strengthening bonds. From the intimacy of a charming pergola to the playful allure of a sail shade, each concept underscores the importance of crafting spaces that nurture both comfort and connection. We’ve explored the elegance of a canopy, the rustic charm of a reclaimed wood structure, and the practicality of a retractable awning. These projects are not just about creating shade; they are about building environments where relationships can thrive.
Now, it’s time to roll up your sleeves and choose one project that resonates with you. Begin today by sketching your vision or gathering materials, laying the first stone in building a haven for your shared moments.
Remember, every structure is a testament to the love and effort you pour into your relationships. Bookmark this article as a guidebook for both DIY aspirations and nurturing your connections. As you construct these havens, embrace the journey towards relationship success, where the shade you build today becomes the cherished memories of tomorrow. Save this guide as a reminder that every small action can lead to lasting warmth and togetherness.