Imagine stepping into your backyard to find a perfectly crafted shade structure that not only enhances your outdoor aesthetic but also offers a refreshing retreat from the sun. Whether you’re a novice just beginning your DIY journey or a seasoned pro looking to add flair to your outdoor space, creating a personalized shade structure can transform your backyard into an inviting oasis. Outdoor living isn’t just about aesthetics; it’s about creating spaces that nurture relaxation and connection.
In this article, you’ll discover 11 innovative DIY shade structures that cater to various styles and skill levels. From simple setups using garden fabrics to more elaborate pergolas, each project is designed to be both achievable and rewarding. Get ready to roll up your sleeves and bring a touch of creativity and comfort to your backyard, making it the perfect haven for sunny days.
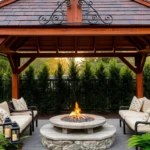
Building a Classic Pergola Design
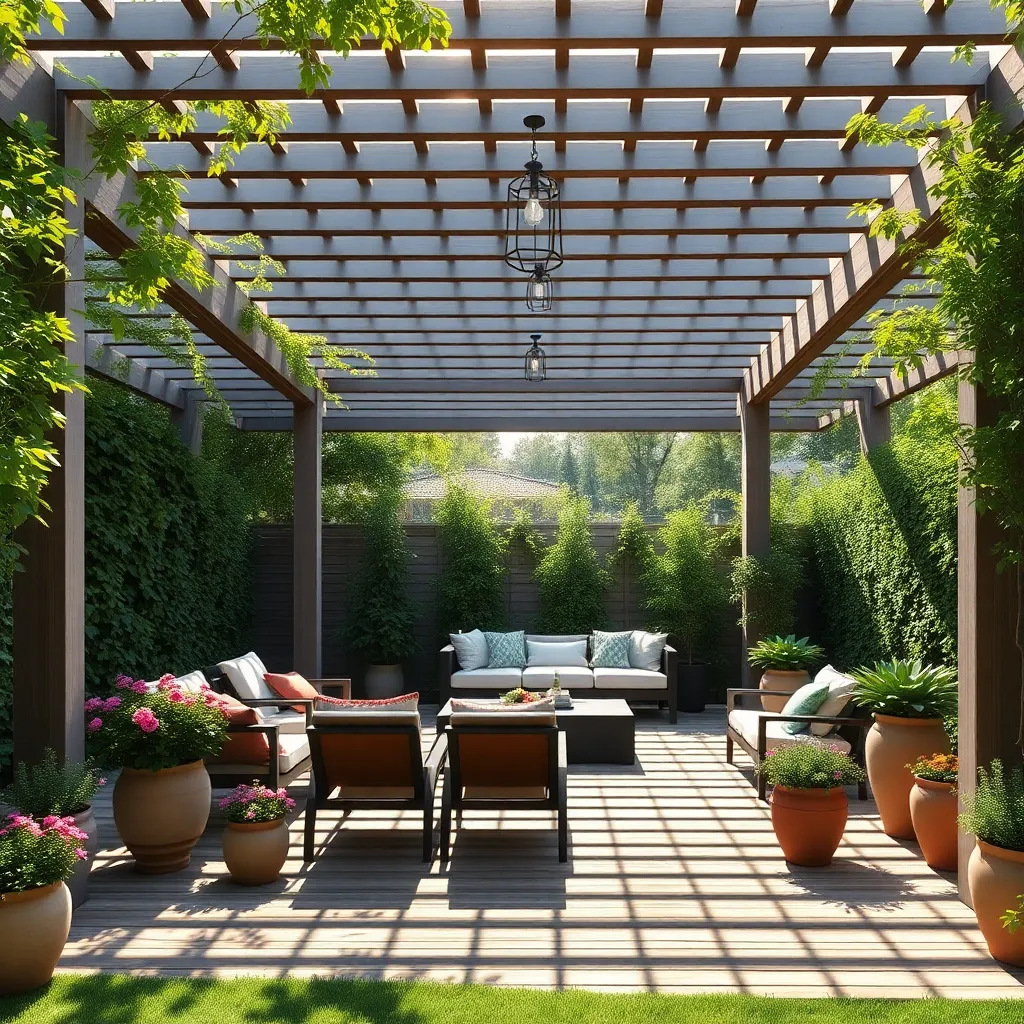
To build a classic pergola, start with choosing durable materials like cedar or pressure-treated lumber for a structure that stands the test of time. Focus on a simple design with four sturdy posts and horizontal beams spaced evenly across the top, ensuring it blends seamlessly with your garden. For beginners, pre-cut kits are an excellent option, providing all materials and instructions needed to assemble with basic tools like a drill and a saw. Advanced builders might consider integrating lattice panels or adding a retractable canopy for added shade and style.
Consider the placement carefully to maximize both shade and aesthetics; positioning your pergola to face the afternoon sun can provide optimal relief during hot days. Anchor your structure securely by setting the posts in concrete, ensuring stability against wind and weather. For a finishing touch, add climbing plants like wisteria or grapevines to soften the woodwork and create a lush, inviting space. These practical steps help create a pergola that not only offers shade but also enhances your outdoor living area with timeless elegance.
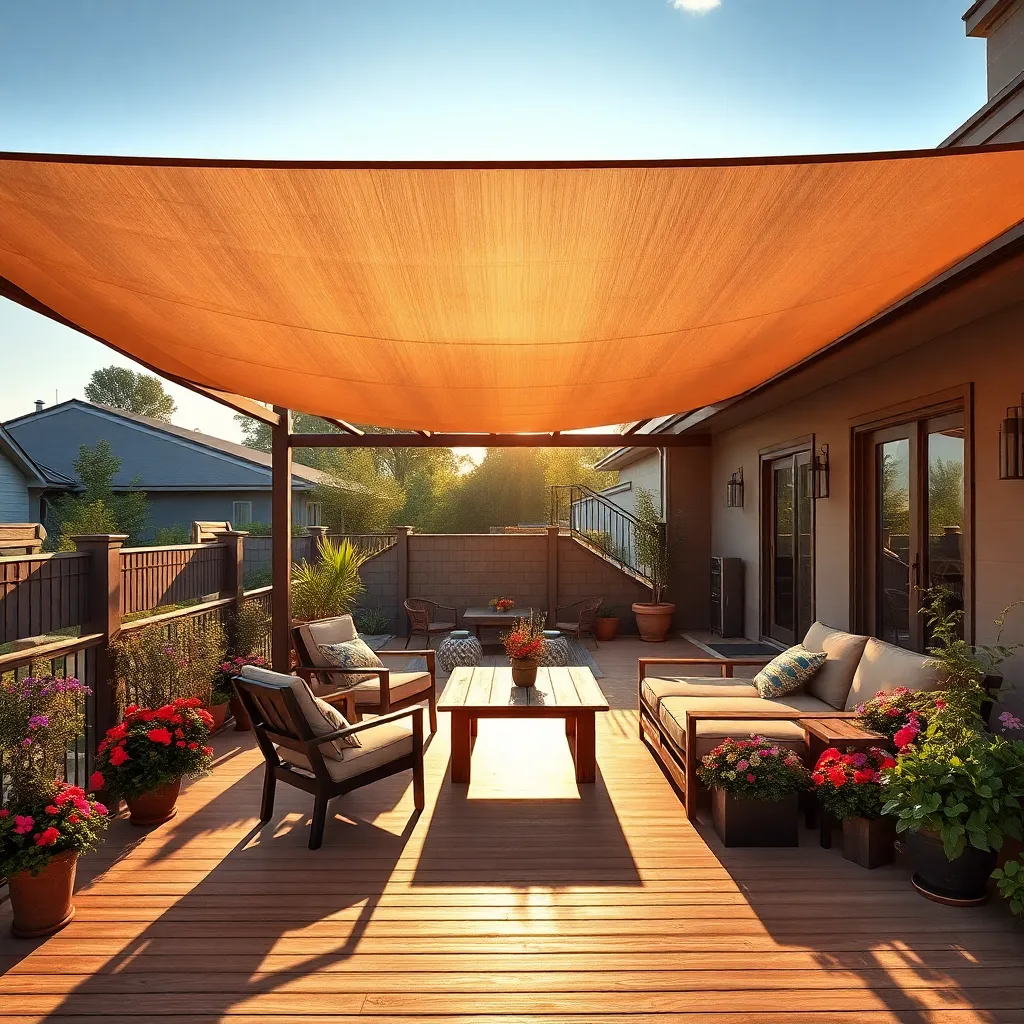
Crafting a Simple Sail Shade
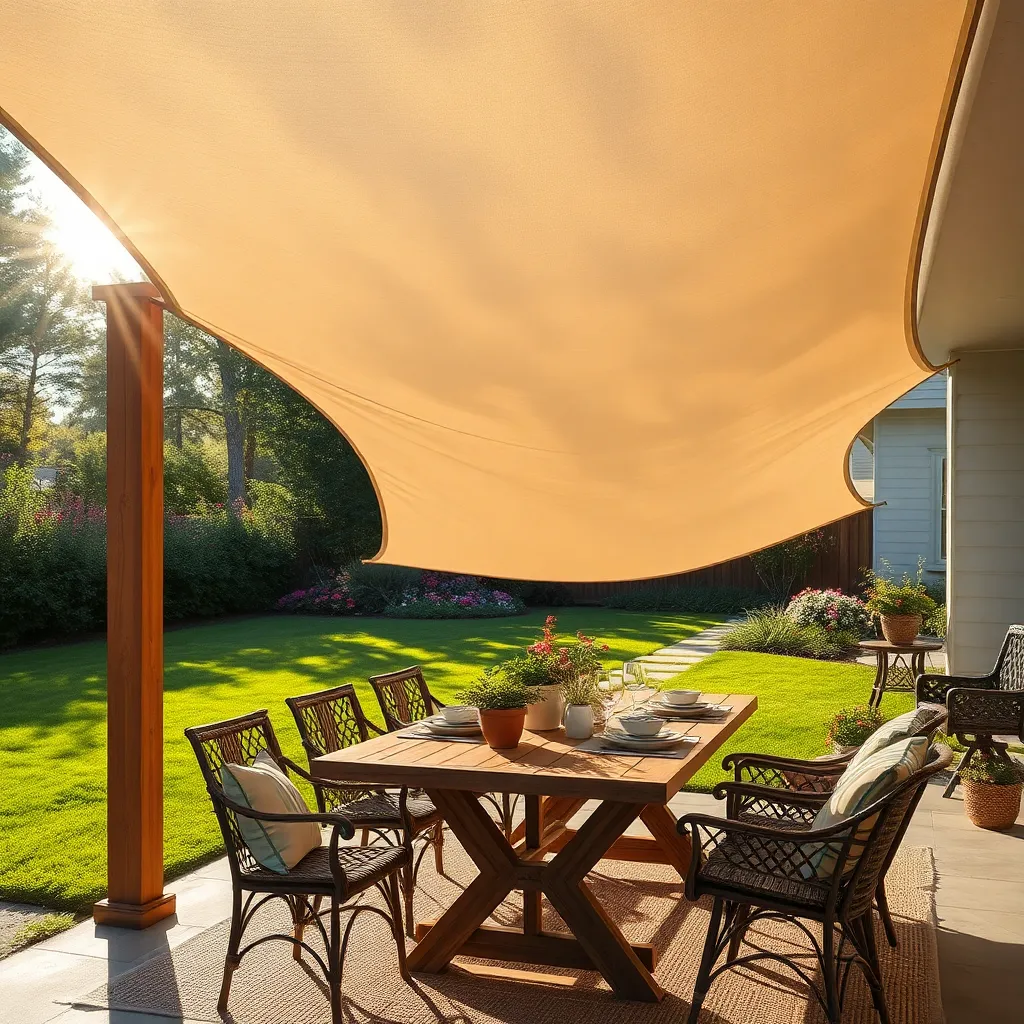
For an easy and stylish way to create shade in your backyard, consider crafting a sail shade. Start by selecting a durable, UV-resistant fabric like high-density polyethylene (HDPE) that’s designed for outdoor use. Measure the area you wish to cover, ensuring you account for a slight slope to allow rainwater to run off. Anchor points are crucial—choose sturdy posts or existing structures like walls or trees to secure the corners of your sail.
Installation is straightforward: use robust stainless steel hardware such as D-rings, turnbuckles, and eye bolts to attach the sail securely. The key to a successful sail shade is tension; ensure the fabric is pulled taut to prevent sagging. For those seeking a more advanced touch, consider adding multiple sails in various shapes and colors to create a dynamic, modern look. This project is perfect for beginners and can be completed in a weekend, offering a quick yet effective way to enhance your outdoor space.
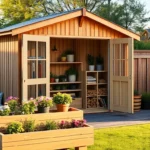
Constructing a Wooden Slat Canopy
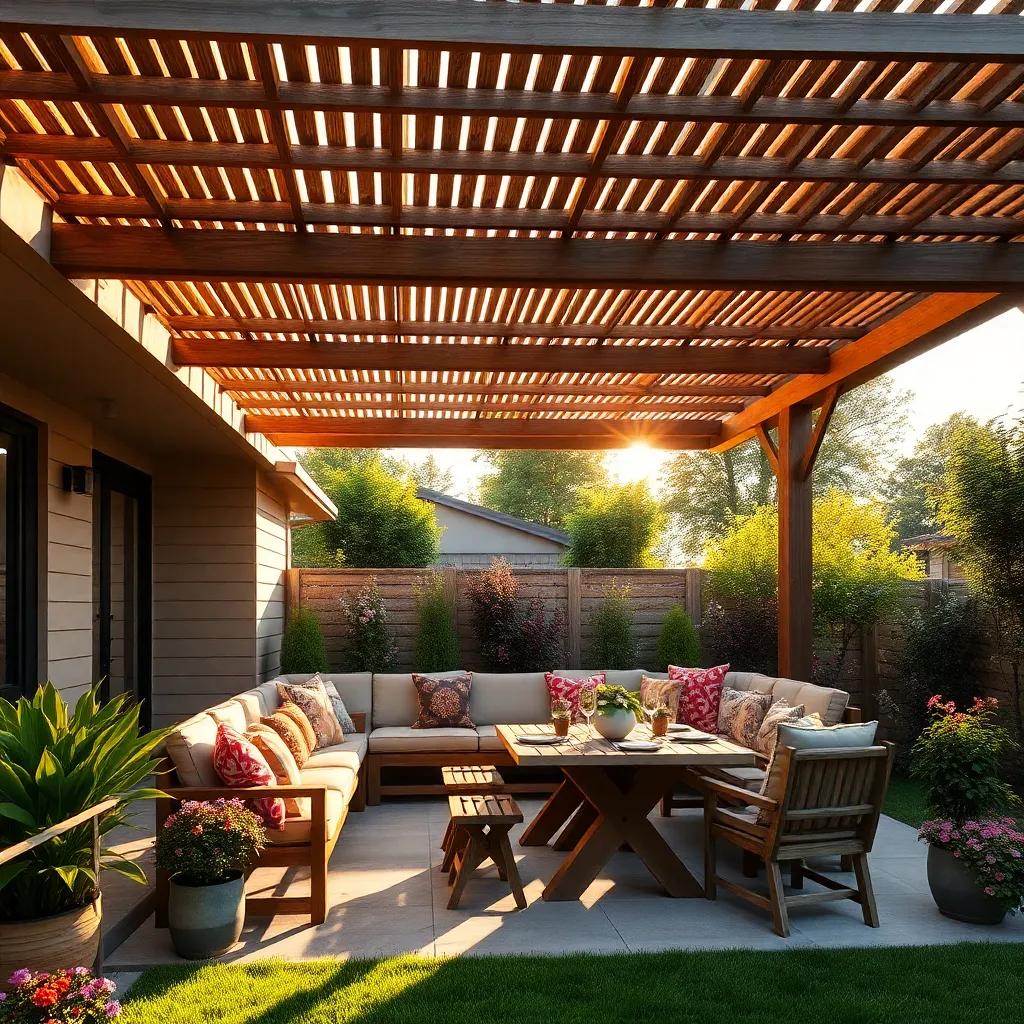
Building a wooden slat canopy is an excellent way to add style and shade to your backyard. Start by selecting durable, weather-resistant wood such as cedar or redwood for the slats, ensuring they are treated to withstand the elements. Measure your desired space accurately—a typical canopy might be 10×10 feet, but adjust according to your needs. Secure the wooden slats to a support frame using galvanized screws, spacing them evenly to allow for airflow and light filtering. This design not only improves aesthetics but also provides a customized shade solution.
For a beginner-friendly approach, consider using prefabricated wooden panels that can be easily attached to a simple frame. Experienced DIYers might add a touch of sophistication by incorporating adjustable slats, allowing for flexible control over sunlight exposure. Enhance the canopy’s functionality by integrating hooks for hanging plants or outdoor lighting to create an inviting atmosphere. Remember, the key to a successful build is ensuring the structure is secured firmly to withstand wind and weather, providing a reliable, long-lasting addition to your outdoor space.
Installing a Retractable Awning System
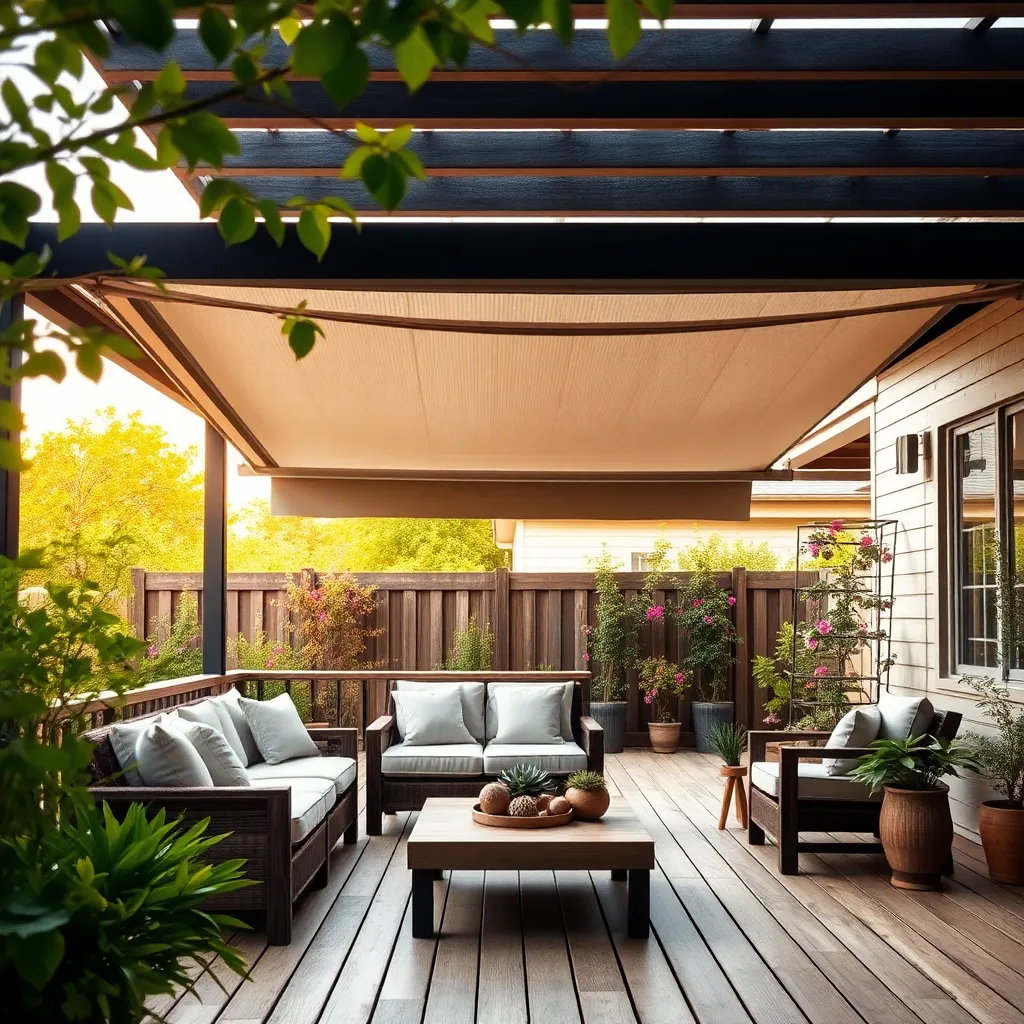
For those looking to add a touch of versatility and convenience to their backyard, installing a retractable awning system can be an excellent choice. Begin by choosing an awning made from durable, weather-resistant fabric, such as acrylic or polyester, which provides protection from UV rays and rain. Measure the area you wish to cover, ensuring that your awning extends at least 8 to 10 feet for optimal shade coverage. Many systems come with a manual crank or a motorized option, allowing you to easily adjust the awning based on the sun’s position or weather conditions.
Before installation, it’s crucial to identify a solid structure for mounting, typically the exterior wall of your home or a sturdy beam. Use heavy-duty brackets and stainless steel screws to ensure your awning is securely attached and can withstand wind. Consider integrating wind sensors in advanced setups, which will automatically retract the awning during high winds, protecting it from damage. With the right tools and a bit of patience, you can create a functional and stylish retreat in your backyard that’s both practical and inviting.
Designing a Rustic Bamboo Shelter
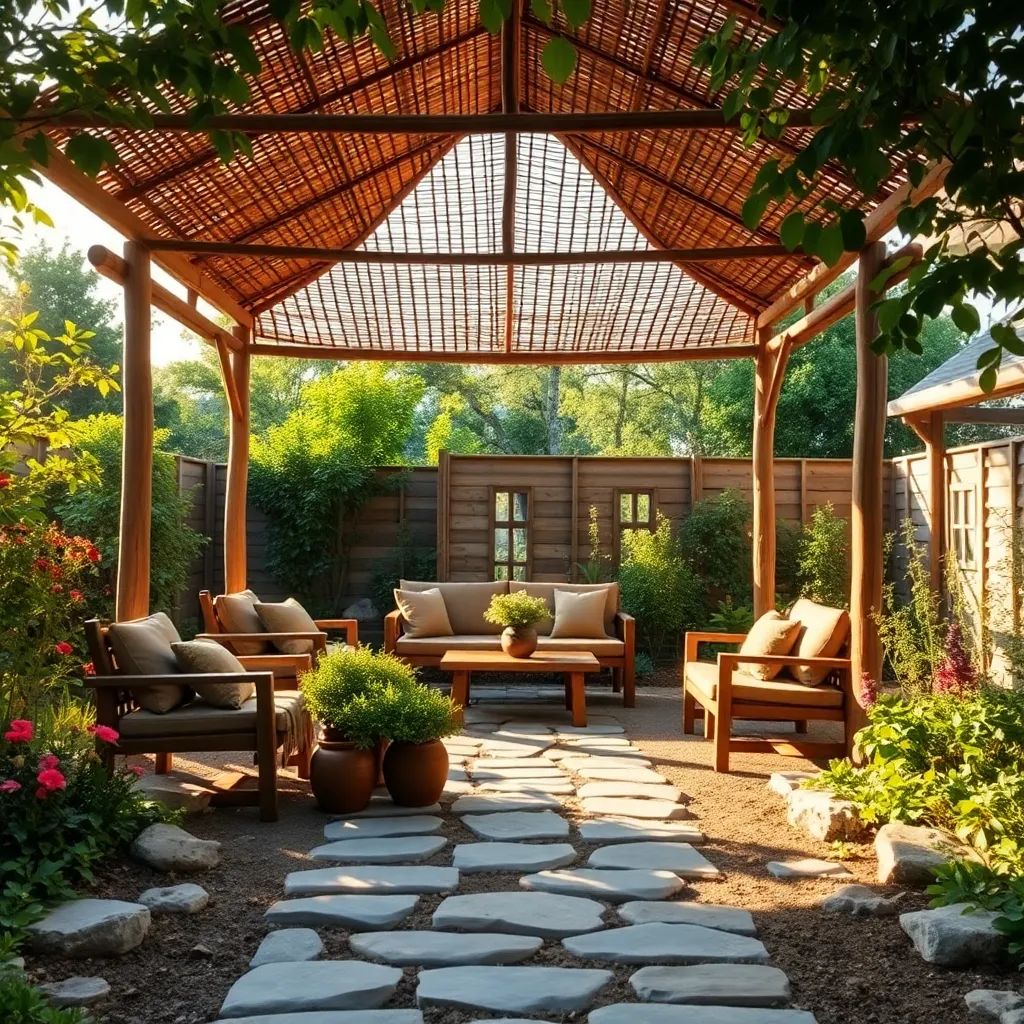
Embracing the natural charm of bamboo, you can create a rustic outdoor shelter that blends beautifully with any landscape. Start by selecting sturdy bamboo poles, ideally around 2-3 inches in diameter and 8-10 feet long, to form the frame. Secure the poles into the ground using concrete or metal brackets to ensure stability. For the roof, bamboo slats or thatch can be laid across the top to provide shade while maintaining the rustic aesthetic. This design not only offers a retreat from the sun but also enhances the natural beauty of your backyard.
To add a touch of sophistication, consider weaving smaller bamboo canes or using rope to create intricate side panels or latticework. Incorporate natural elements, like climbing plants or hanging lanterns, to personalize your space and increase the shelter’s visual appeal. Beginners can start with a simple rectangular form, while more experienced builders might experiment with shapes like hexagons or octagons for added complexity. Remember, bamboo is an eco-friendly material that is both durable and sustainable, making it an excellent choice for an outdoor retreat that can withstand the elements.
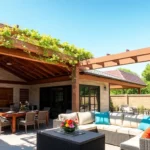
Creating a Lush Green Trellis
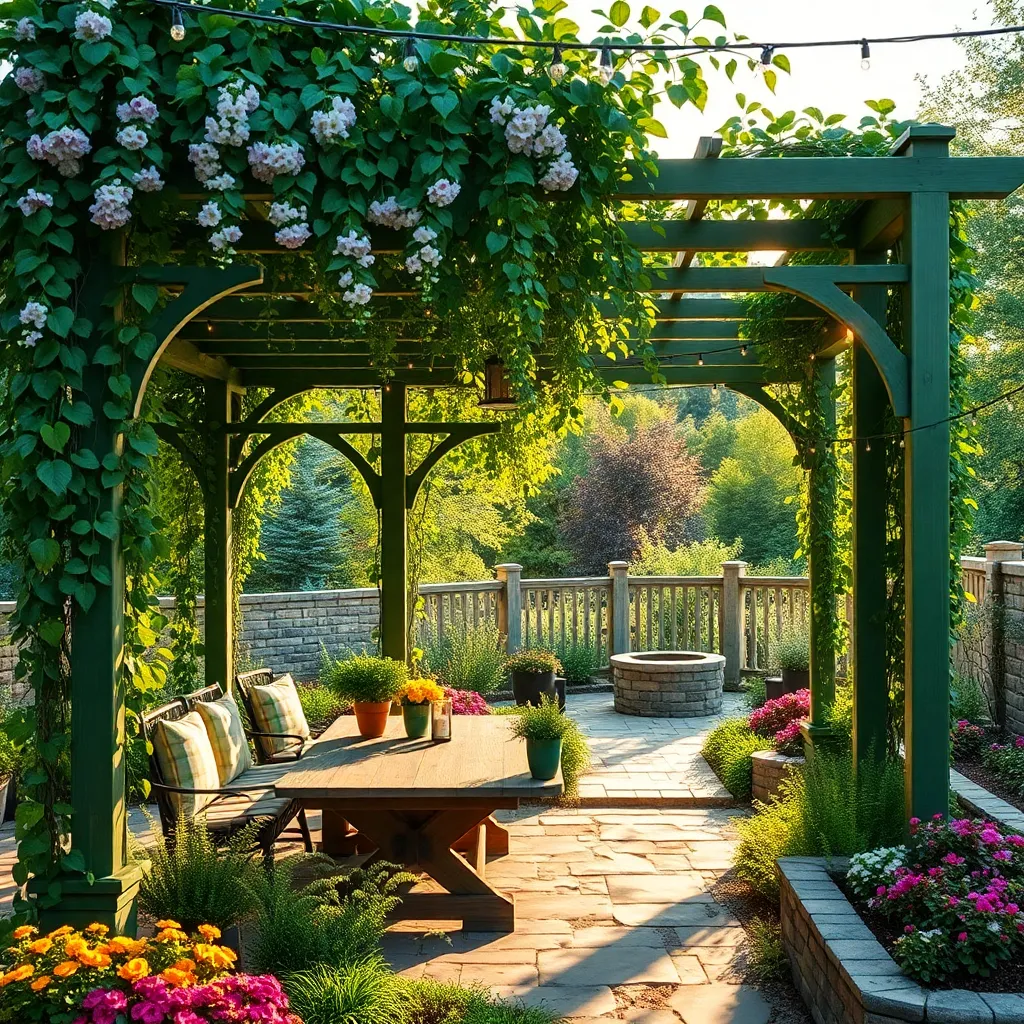
Transform your backyard into a verdant retreat by creating a lush green trellis. Start with sturdy materials like cedar or metal for the frame, ensuring it is at least 6-8 feet high to provide ample shade. Consider climbing plants such as jasmine, wisteria, or clematis to weave through the structure. These plants not only offer shade but also add natural beauty and fragrance to your space. For beginners, pre-built trellis panels are an excellent option, offering simplicity and ease of installation.
Enhance your trellis with thoughtful design elements that blend functionality and aesthetics. Incorporate a mix of vertical and horizontal slats to support plant growth and create a visually appealing pattern. For an advanced touch, integrate solar-powered string lights to illuminate your space at night, adding charm and usability. To ensure your trellis thrives, plant climbers in nutrient-rich soil and provide regular watering, especially during dry spells. These small details will make your trellis both a practical and stunning addition to your backyard.
Assembling a Portable Pop-Up Gazebo
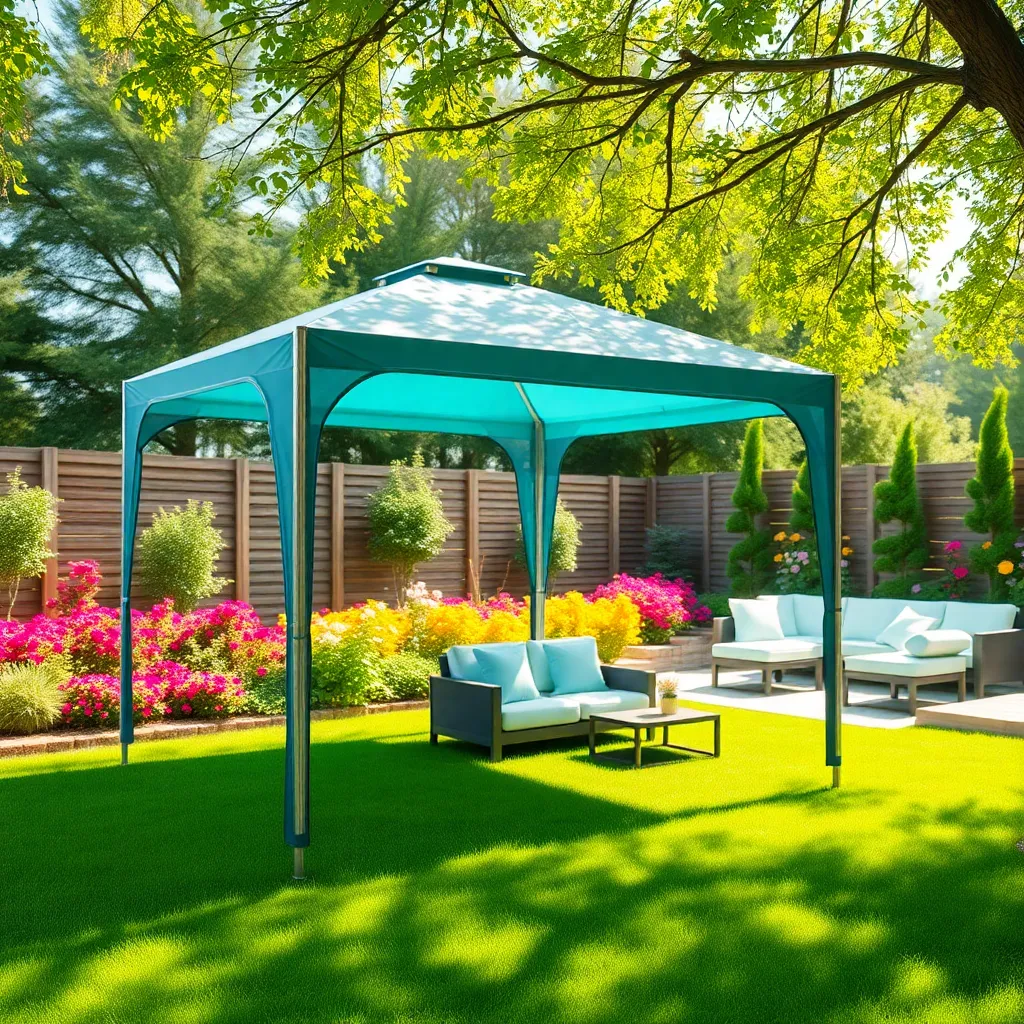
Assembling a portable pop-up gazebo is an excellent way to add shade and style to your backyard with minimal effort. Start by choosing a gazebo size that complements your space, typically ranging from 8×8 to 12×12 feet. Most pop-up gazebos come with a collapsible frame, canopy, and stakes for secure setup. Begin by unfolding the frame and extending the legs to your desired height, then attach the canopy by securing it with the provided clips or Velcro straps. For added stability, use sandbags or weights on each leg, especially in windy conditions.
Consider adding personal touches to make your gazebo a cozy retreat. String lights or curtains can be easily added to the frame for ambiance and privacy. For a more advanced touch, install a removable mosquito net to keep bugs at bay during evening gatherings. When not in use, these gazebos can be conveniently stored in a carry bag, making them ideal for both permanent installations and temporary setups, such as garden parties or family picnics. With a little creativity and effort, a pop-up gazebo can transform your outdoor space into a welcoming oasis.
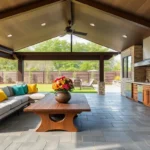
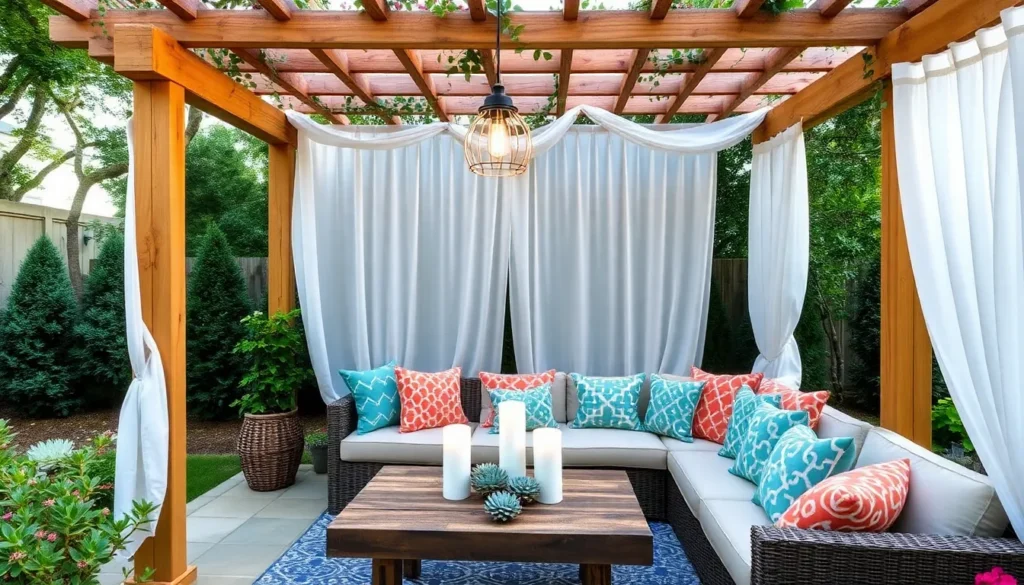
Fashioning a Fabric-Covered Pavilion
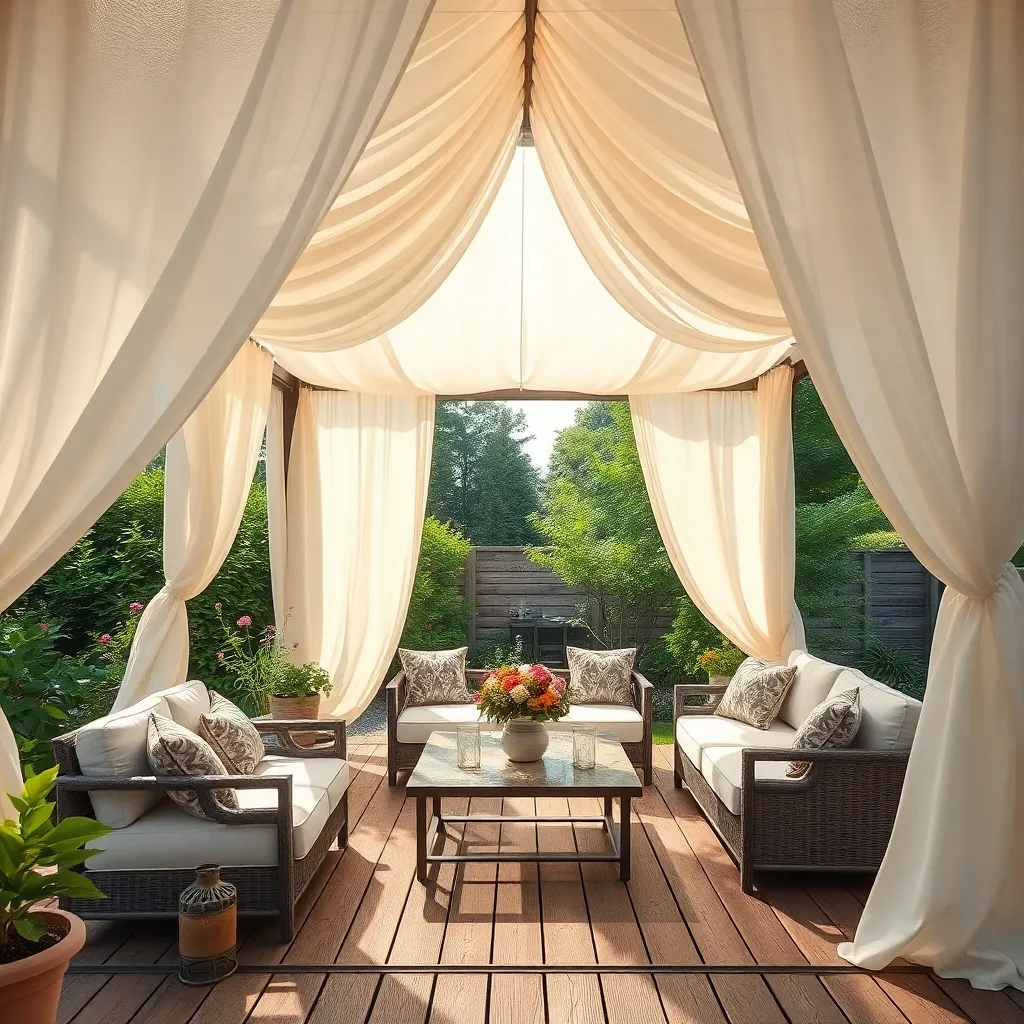
Creating a fabric-covered pavilion offers a stylish and versatile solution for backyard shade. Begin by selecting a sturdy frame material, such as galvanized steel or aluminum, which provides excellent support and durability. Measure your desired area, typically around 10×12 feet, to ensure the pavilion fits well within your space. Choose outdoor fabric that is weather-resistant and UV-protected, like acrylic canvas, to ensure longevity and color retention. For a beginner-friendly approach, opt for a pre-made frame kit that includes assembly instructions.
For those looking to add personal flair, consider incorporating design elements such as drapes for added privacy or mosquito netting for pest control. Secure the fabric to the frame using grommets and heavy-duty bungee cords, ensuring a taut fit that resists wind. For a more advanced touch, install solar-powered lights along the frame for evening ambiance. Regular maintenance, such as cleaning the fabric with mild soap and water, will keep your pavilion looking fresh throughout the seasons. With these steps, your backyard can effortlessly transform into a chic retreat.
Erecting a Modern Metal Frame Cover
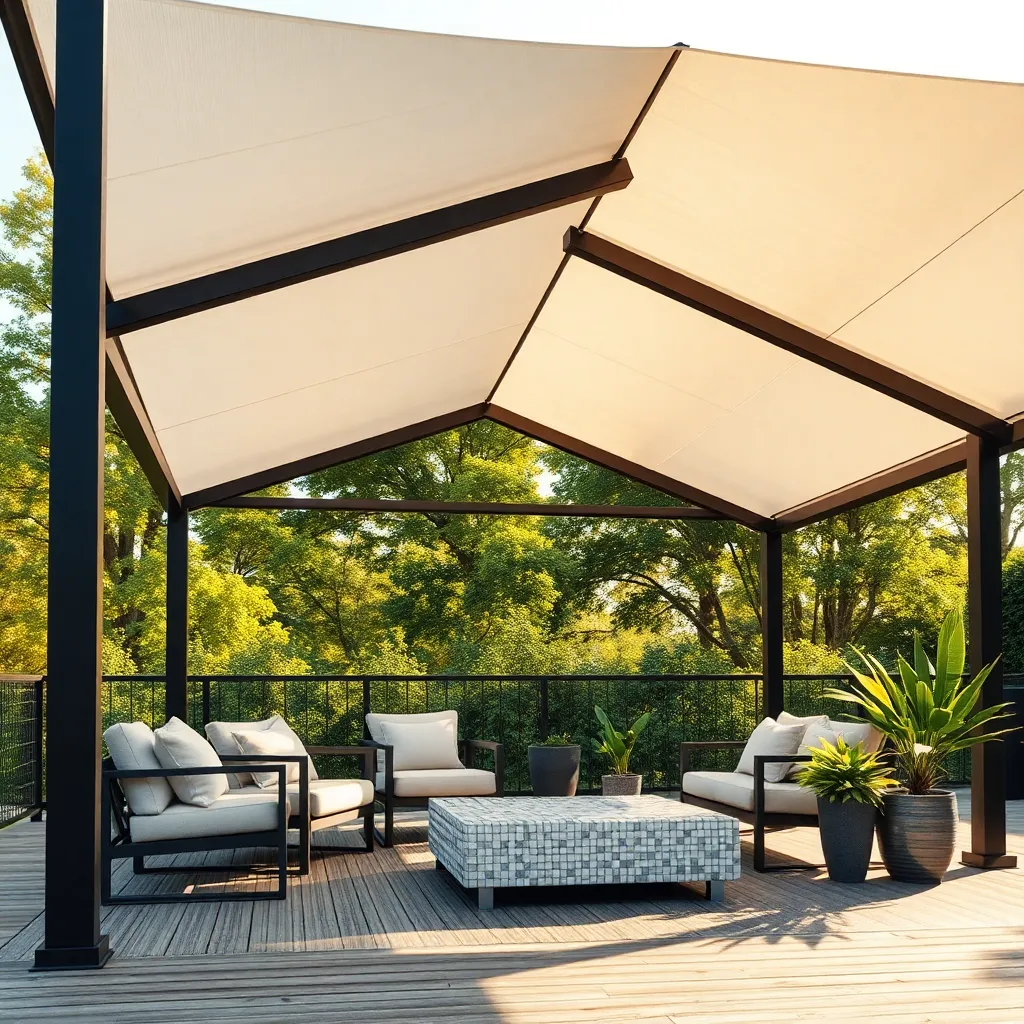
Building a modern metal frame cover offers a sleek and durable solution to your backyard shading needs. Start by selecting high-quality, weather-resistant materials like aluminum or galvanized steel to ensure longevity. Use a basic rectangular design for simplicity, with dimensions adjustable to your space—common sizes are around 10×10 feet. For beginners, pre-fabricated kits with clear instructions can simplify the process, while more experienced DIYers might prefer custom builds with unique angles and features.
Consider adding polycarbonate panels or tensioned fabric as a covering for a blend of shade and transparency. These elements allow natural light while protecting against UV rays. Ensure the structure is securely anchored into the ground using concrete footings or heavy-duty ground stakes for stability, especially in windy areas. For an advanced touch, integrate LED lighting strips along the frame to extend usability into the evening, creating a cozy ambiance for nighttime gatherings.
Developing a Shade Cloth Structure
To develop a shade cloth structure that’s both functional and aesthetically pleasing, start by selecting the right materials. Opt for a UV-stabilized shade cloth, which provides excellent sun protection and durability. For a versatile setup, choose a cloth with 30-50% shade factor for vegetables or up to 70% for patios and seating areas. Construct a simple frame using PVC pipes or wooden posts, ensuring they are securely anchored into the ground to withstand wind and weather. A basic rectangular frame is often easiest, but feel free to experiment with triangular or custom shapes for a unique touch.
Consider adding reinforced grommets to the edges of your shade cloth to make attachment and tensioning a breeze. Use bungee cords or heavy-duty zip ties to secure the cloth to your frame, allowing you to easily adjust or remove it as needed. For a more polished look, incorporate decorative elements like hanging plants or outdoor lights along the edges of the structure. Advanced gardeners can integrate irrigation systems or misting lines into the frame to keep plants cool and hydrated. This DIY project not only enhances your backyard’s comfort but also extends your outdoor living space, making it a practical and inviting area for family and friends.
Incorporating Natural Tree Canopies
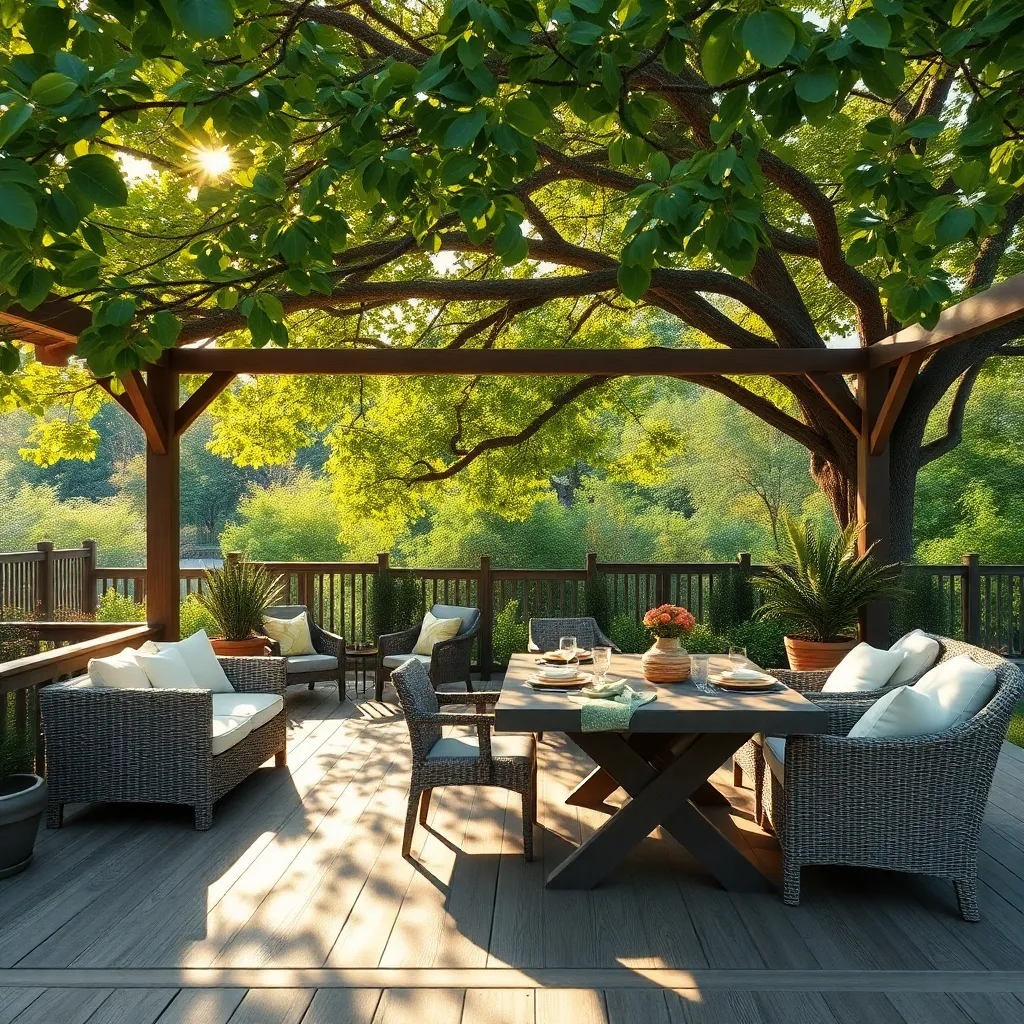
Utilizing the natural canopy of mature trees can be a highly effective way to create shade in your backyard. Begin by identifying trees with dense foliage that can provide ample coverage. Prune lower branches to allow for comfortable seating and ensure there’s a clear area beneath for activities. For added comfort, consider laying a simple gravel or flagstone patio beneath the trees, which not only enhances aesthetics but also defines the space.
For those looking to maximize this natural resource, consider enhancing the canopy’s effect with outdoor elements. Installing hammocks or swings can transform the area into a relaxing retreat. Additionally, stringing solar-powered lights through the branches will create a magical ambiance for evening gatherings. If you’re more experienced, you might integrate a small water feature or a birdbath to attract wildlife, further enriching your natural oasis. Remember, always choose materials that complement your garden’s existing aesthetic and are durable for outdoor use.
Conclusion: Creating Beautiful Outdoor Spaces
In exploring the diverse world of DIY shade structures, you’ve just uncovered 11 creative approaches to transform your backyard into a haven of comfort and intimacy. From the simplicity of a fabric canopy to the elegance of a pergola, and the versatility of a retractable awning to the coziness of a sail shade, each structure symbolizes the foundation of strong relationships: creating spaces where warmth and connection can flourish. These projects reflect the importance of nurturing relationships, providing shelter from life’s harsh elements, and encouraging time spent together.
To take immediate action, choose one project that resonates with you and start planning your weekend transformation. Perhaps involve a loved one in the process, turning the creation of your shade structure into a memorable shared experience.
Remember, relationships, like gardens, thrive with care and creativity. Bookmark this article as a handy guide for future inspiration and share it with others who might benefit from these transformative ideas. As you invest in these projects, you’re also investing in the success of your relationships, nurturing bonds that will grow stronger with each shared moment under your new, personalized shade. Your backyard—and your relationships—await a brighter, more connected future.