Imagine stepping into your backyard to find a cozy, inviting retreat that you crafted with your own hands. Whether you’re a beginner just venturing into the world of DIY or an experienced homeowner looking to refresh your outdoor space, this guide is your gateway to creating beautiful shelters that are both affordable and achievable.
From the joy of sipping morning coffee under a pergola you built yourself, to the satisfaction of hosting friends beneath a charming canopy, the possibilities are endless. Our selection of 15 innovative and budget-friendly DIY shelter ideas will not only enhance your outdoor living area but also boost your confidence in transforming any space into a personal paradise. Let’s get started on turning dreams into reality!
Construct a Simple Tarp Shelter
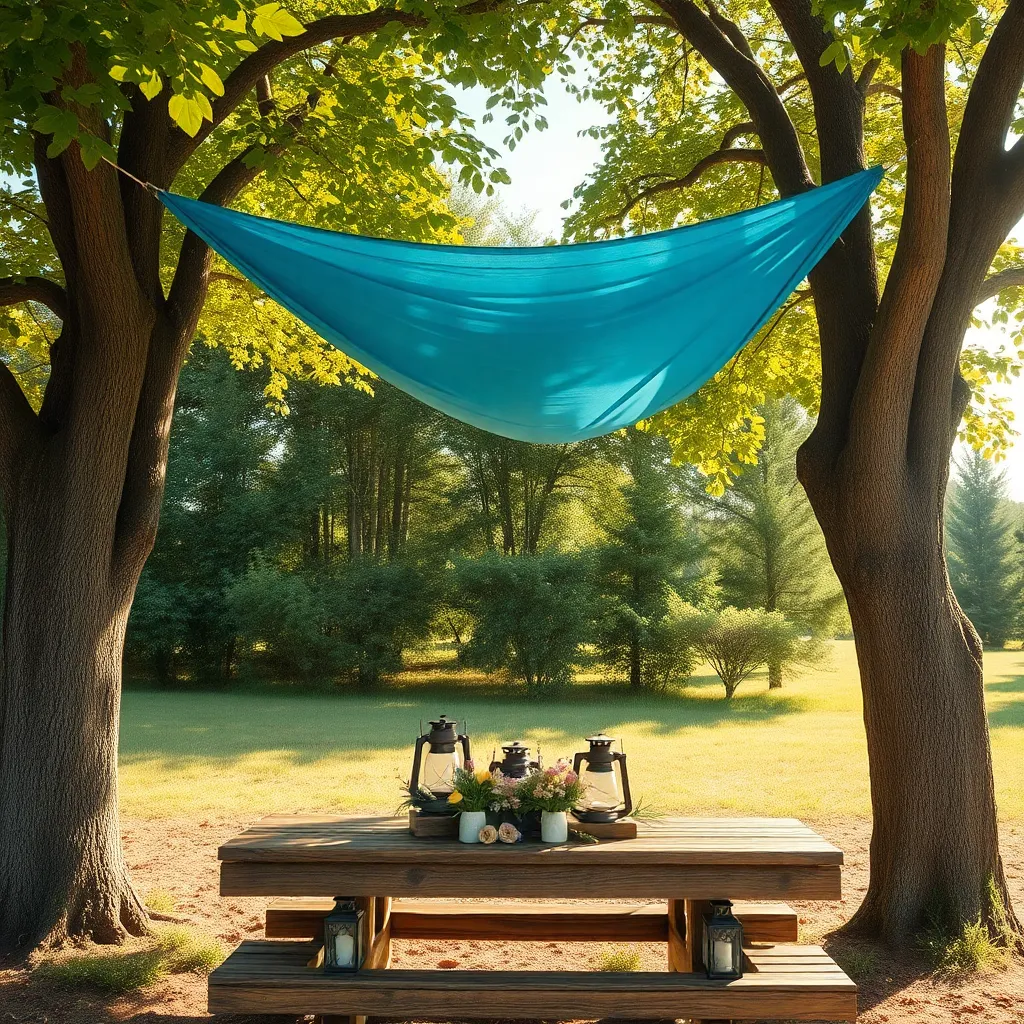
Creating a simple tarp shelter is an excellent way to enjoy the outdoors while staying protected from the elements. Start with a high-quality, waterproof tarp—around 10×10 feet is ideal for most uses—and a set of sturdy ropes or paracord. Choose a location with two anchor points, like trees or poles, about 8-10 feet apart, to provide a solid foundation for your shelter. For beginners, a basic “A-frame” design is easy to construct: tie the tarp to the anchor points and secure it to the ground with stakes to create a tent-like structure.
For those seeking a sturdier build, consider reinforcing the tarp edges with grommets and using adjustable tensioners for the ropes to maintain stability in windy conditions. Advanced tips include adding a groundsheet for extra comfort and using a secondary tarp as a windbreak or additional rain cover. Keep in mind, the type of tarp and its thickness can greatly influence the durability and effectiveness of your shelter. This DIY project not only enhances your outdoor space but also provides a quick, cost-effective solution for impromptu gatherings or camping adventures.
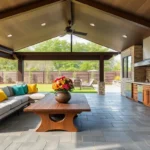
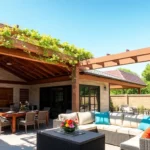
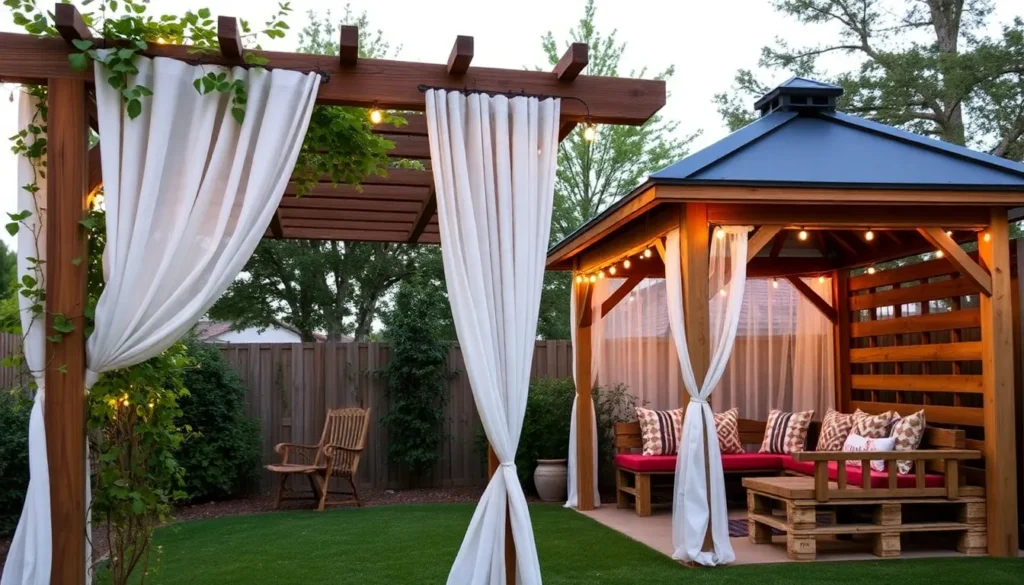
Build a Pallet Wood Pergola
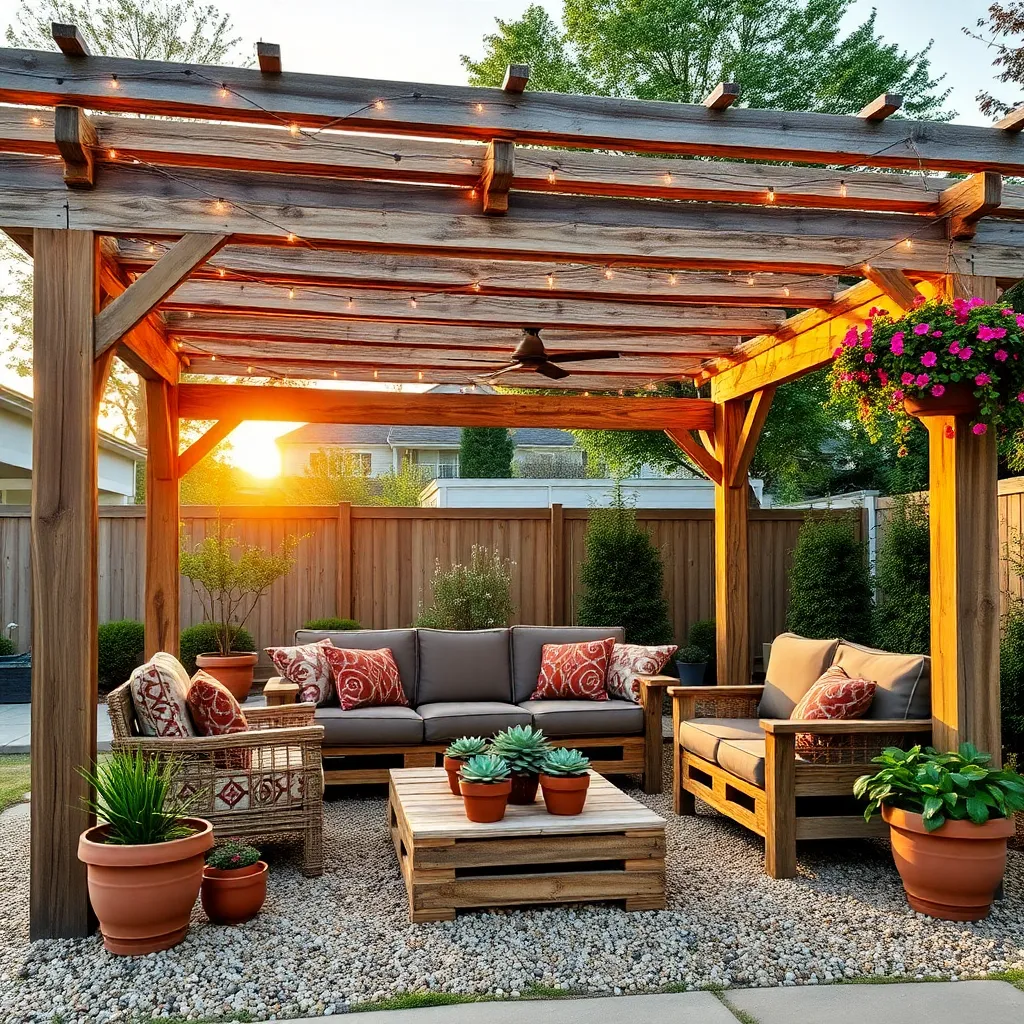
Transform your backyard with a rustic yet elegant pallet wood pergola. Start by gathering sturdy wooden pallets, which you can often find at warehouses or home improvement stores. You’ll need about six to eight pallets, depending on your desired size. Arrange them to create a simple four-post structure, securing them with galvanized screws for stability. For added charm, consider staining or painting the wood to match your outdoor aesthetic. This project is perfect for beginners, offering a low-cost way to enhance your outdoor living space.
Experiment with design elements like climbing plants or hanging lights to personalize your pergola. Ensure the structure is anchored firmly by setting the posts into concrete footings, which will enhance durability against weather conditions. For advanced DIYers, incorporate a lattice roof to provide shade and support for vining plants. Remember to measure your space accurately and make adjustments for uneven ground. With a little effort, you can create a cozy, inviting retreat perfect for relaxing or entertaining.
Assemble a Bamboo Canopy Frame
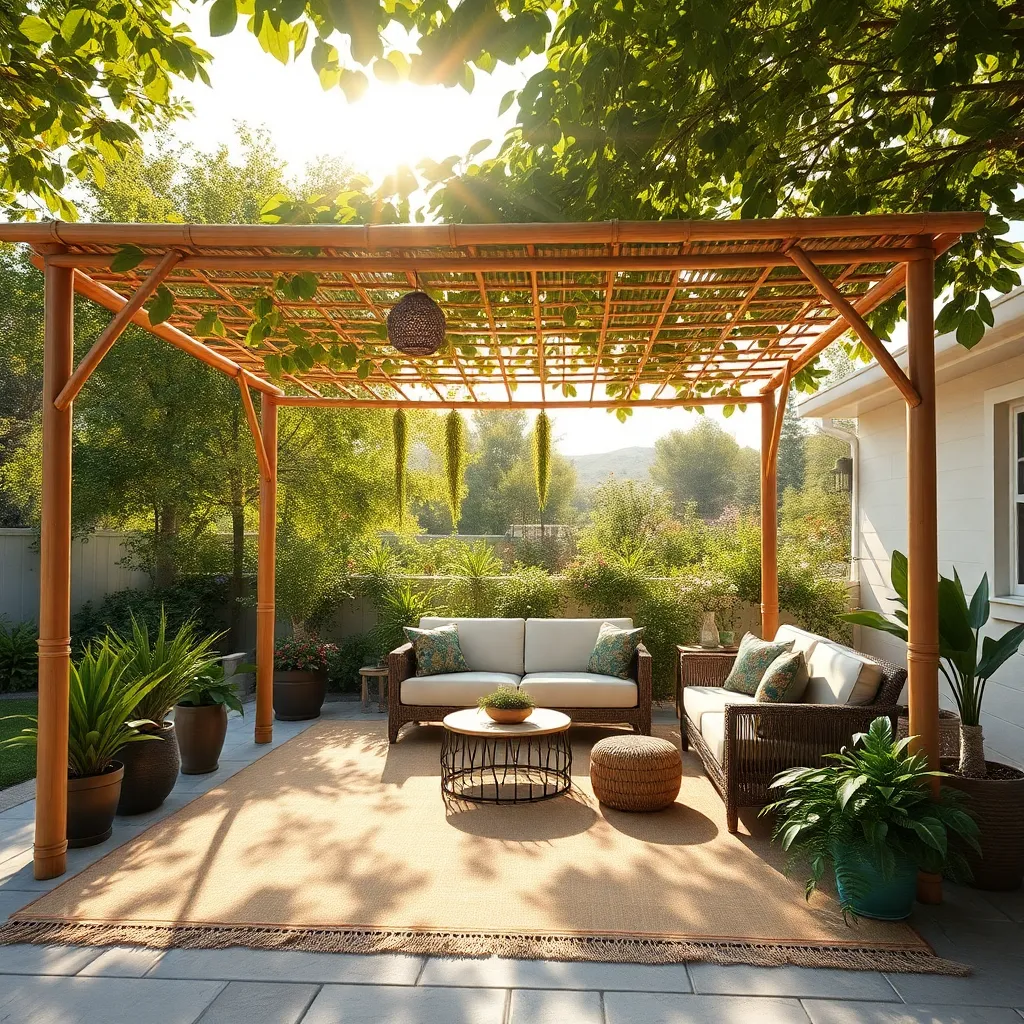
Creating a bamboo canopy frame is an eco-friendly and stylish way to add shade to your outdoor space. Start by selecting sturdy bamboo poles, ideally around 8-10 feet in length, which you can find at garden centers or online. You’ll need at least four poles for the vertical supports and additional poles for horizontal and cross-bracing. Use rope or zip ties to securely join the poles at the top, forming a stable structure. Beginners will find this material forgiving and straightforward to work with, while advanced DIYers can experiment with different angles and shapes for a customized canopy.
For enhanced durability, consider treating the bamboo with a water-resistant sealant to protect against the elements. Once your frame is up, drape a weather-resistant fabric, like a UV-protected canvas, over the top for shade. Secure the edges with clips or ties to prevent it from blowing away in the wind. For a decorative touch, you can weave solar-powered string lights through the bamboo to create a cozy evening ambiance. With its natural aesthetic, a bamboo canopy not only provides shelter but also seamlessly integrates with your garden’s environment.
Create a Shade Sail Structure
Transform your backyard with a stylish and functional shade sail structure, perfect for creating a cool retreat. Begin by selecting a durable, weather-resistant fabric such as UV-rated polyethylene, which comes in various colors to complement your outdoor aesthetics. To ensure stability, you’ll need three or four anchor points—these can be existing structures like walls or robust wooden posts securely planted in the ground. Use stainless steel hardware, such as turnbuckles and eye bolts, to attach the sail, allowing for tension adjustment that accommodates seasonal changes and ensures a taut, wrinkle-free appearance.
For those looking to add an advanced touch, consider incorporating adjustable poles that enable you to change the sail’s angle, maximizing shade coverage throughout the day. Measure carefully to ensure your sail is large enough to cover your desired area, leaving approximately 10% more fabric for tensioning. If you’re a beginner, start with a triangular sail for easier installation and fewer anchor points. For more complex designs, like overlapping sails, ensure that each sail has its own dedicated anchor points to prevent sagging. Design with purpose by aligning your sails to create a dynamic look, offering both functionality and an artistic element to your outdoor space.
Erect a DIY Lean-To Shelter
A DIY lean-to shelter is a simple yet effective way to create a cozy outdoor space, providing protection from both sun and rain. Begin by selecting a sturdy wall of your home or another structure as a support. You’ll need pressure-treated lumber for the frame, corrugated plastic or metal sheets for the roof, and galvanized screws for assembly. Ensure the lean-to is slightly angled to allow rainwater to run off, and consider a width of around 8 to 10 feet to comfortably cover a small seating area.
For a more personalized touch, integrate decorative elements such as hanging plants or fairy lights to enhance the ambiance. Advanced builders might add side panels using lattice or weather-resistant fabric for additional privacy and wind protection. Before you start, check local building codes to ensure compliance. By following these steps, you’ll add a charming, functional feature to your outdoor space that encourages relaxation and enjoyment.
Design a Reclaimed Wood Gazebo
Using reclaimed wood to design a gazebo not only adds a rustic charm but is also an eco-friendly choice. Start by sourcing sturdy, weather-resistant wood from old barns or pallets, ensuring the pieces are free from rot and pests. For a basic structure, plan a square or hexagonal shape, typically around 10×10 feet, to provide ample space without overwhelming your yard. Keep the roof simple with a sloped design to allow rainwater to run off easily, using corrugated metal sheets for an affordable and durable cover.
Secure the gazebo with concrete footings to ensure stability, particularly if you live in a windy area. Use galvanized screws and brackets to assemble the frame, as these will withstand the elements better than regular fasteners. For an extra touch of sophistication, consider incorporating decorative elements like lattice side panels or trellis work for climbing plants. Finish by treating the wood with a weatherproof sealant to protect it from moisture and UV rays, extending the life of your outdoor oasis. Remember, a reclaimed wood gazebo not only offers shelter but also becomes a highlight of your backyard with its unique character.
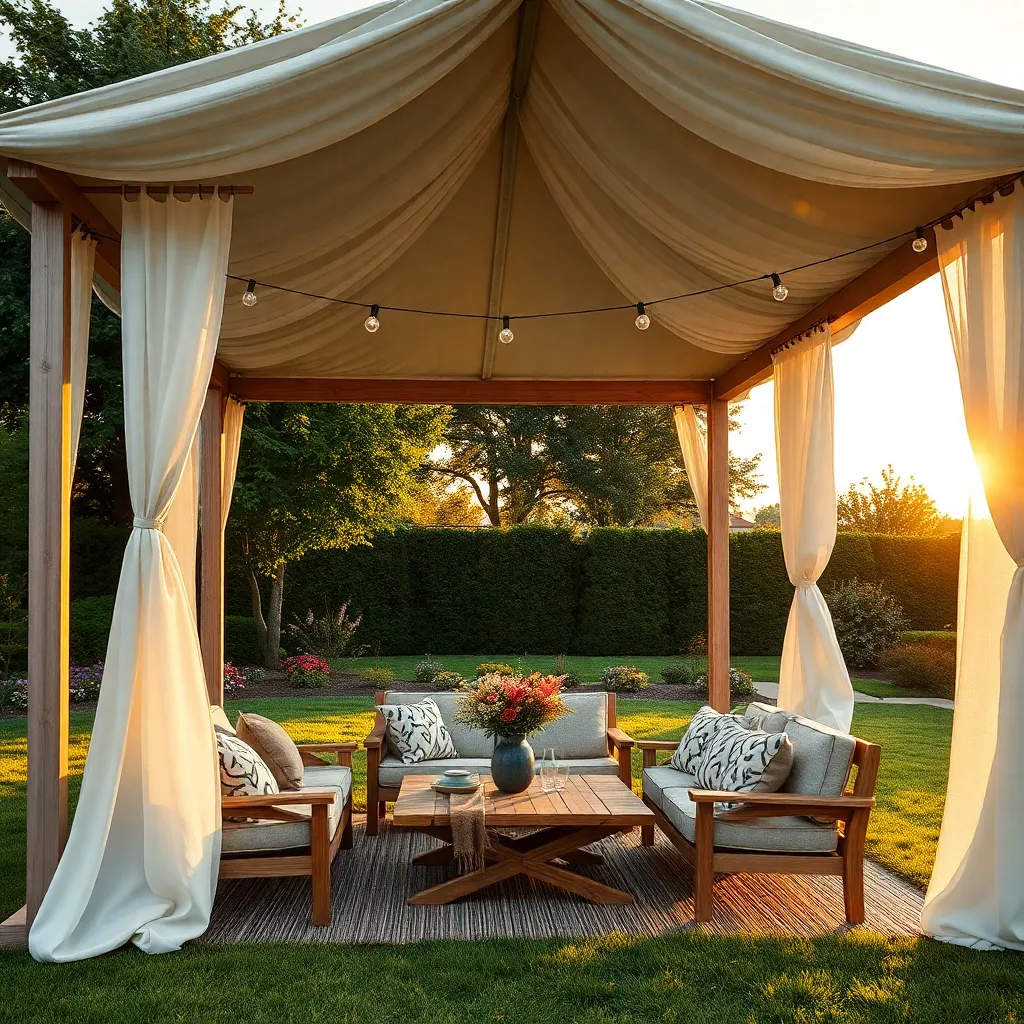
Install a Rope and Fabric Awning
Elevate your outdoor space with a rope and fabric awning that not only provides shade but also adds a touch of elegance. Start by selecting a durable, weather-resistant fabric in a color that complements your outdoor décor. You’ll need strong, UV-resistant rope to support the awning securely. Measure the area where you want the awning, ensuring the fabric covers your desired space without sagging. For beginners, a simple rectangular design is easiest; ensure the fabric’s edges are hemmed to prevent fraying.
Secure the rope by attaching it to sturdy anchor points, like nearby trees or metal poles, with durable carabiners or hooks. For additional stability, consider using tension rods or a pulley system to adjust the awning’s height and angle. Advanced tip: Incorporate retractable elements by adding cleats to tie off rope ends, allowing you to extend or retract the awning as needed. This versatile setup not only offers a cozy retreat from the sun but also lets you experiment with different fabric textures and patterns to enhance your outdoor ambiance.
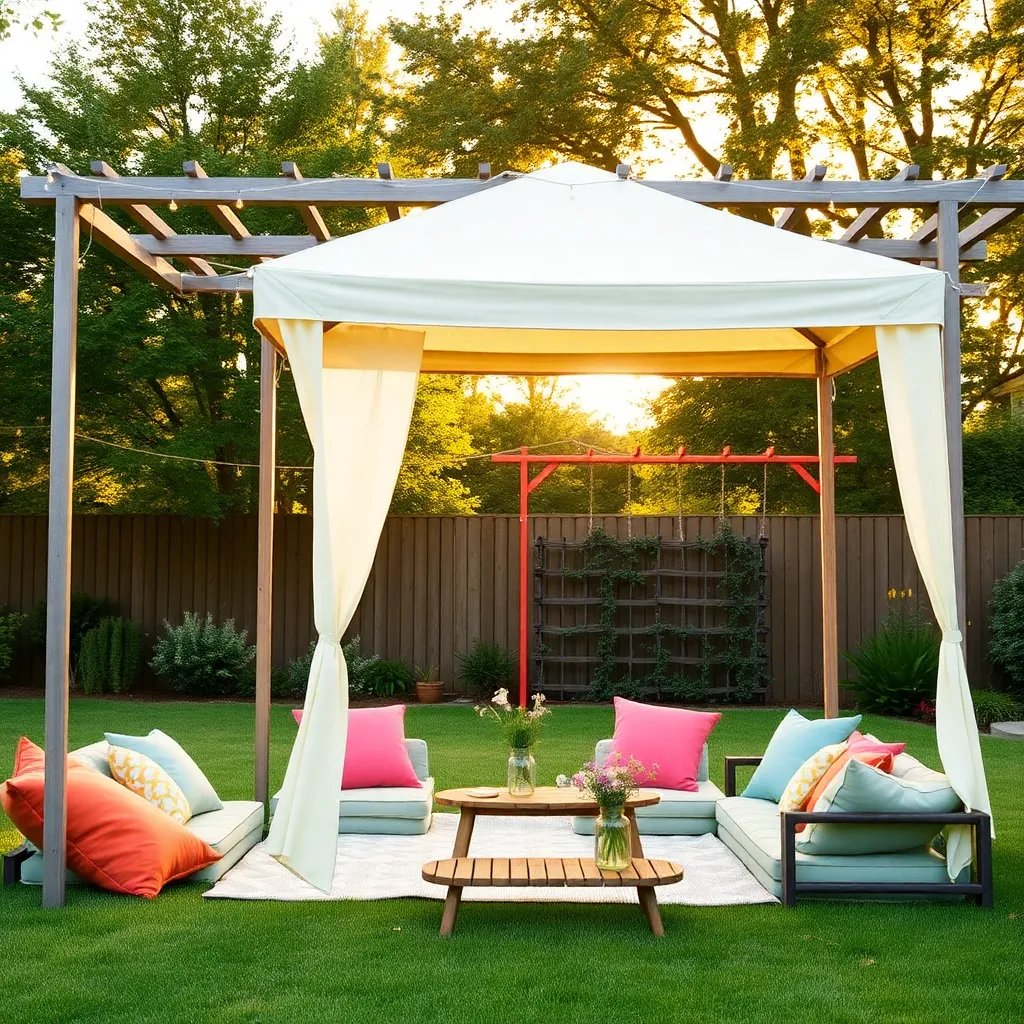
Fashion a Portable Tent Pavilion
Creating a portable tent pavilion is an excellent way to add a versatile outdoor shelter to your space. Start by selecting a durable, weather-resistant fabric such as polyester or canvas, which will provide protection against the elements. Use lightweight, collapsible poles made of aluminum or fiberglass to construct the frame, ensuring easy setup and takedown. For stability, anchor the structure using stakes or sandbags, especially if you’re setting it up on grass or sand. This setup is perfect for those who enjoy moving their outdoor gatherings or want a temporary shelter solution.
For a more refined look, consider incorporating design elements like curtains or netting to your pavilion. These can be attached with clips or Velcro strips for a touch of elegance while also providing additional shade or insect protection. Adding a floor of interlocking tiles or a simple outdoor rug can improve comfort and define the space. Experiment with dimensions to fit your needs, typically aiming for a height of around 8 feet and a width of 10 feet, but adjust as necessary to accommodate your outdoor area. With these tips, you’ll create a functional and inviting retreat that enhances any outdoor setting.
Craft a Rustic Log Shelter
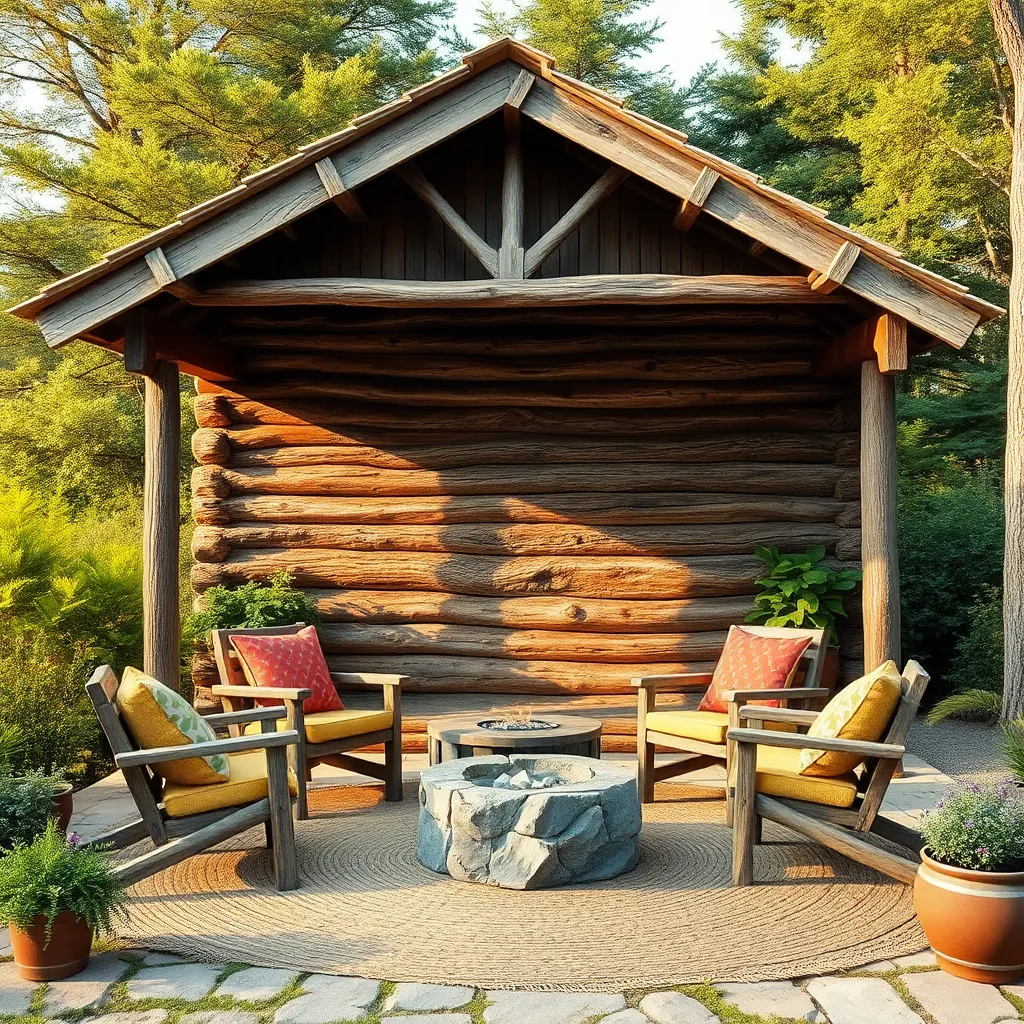
For those who admire the timeless charm of nature, crafting a rustic log shelter is an inviting project. Start by sourcing sturdy logs, ideally from fallen or sustainably harvested trees, to create a strong frame. Arrange the logs in a simple, interlocking design, similar to a log cabin, to ensure stability. Consider using logs with a diameter of 6 to 8 inches for a balanced look and structural integrity. To add a touch of personality, incorporate additional features like a slanted roof using corrugated metal or wooden planks, which can help with rainwater runoff.
Incorporating some advanced techniques can elevate your log shelter into a cozy retreat. Seal the gaps between the logs with natural materials like moss or clay for an authentic look and enhanced insulation. Consider adding a small stone or brick fireplace to create warmth and ambiance. For a more polished appearance, you can sand and treat the logs with a weatherproof finish to protect against the elements. Whether used as a garden retreat or a unique backyard feature, a rustic log shelter offers both functionality and a connection to the serene outdoors.
Use PVC Pipes for a Frame
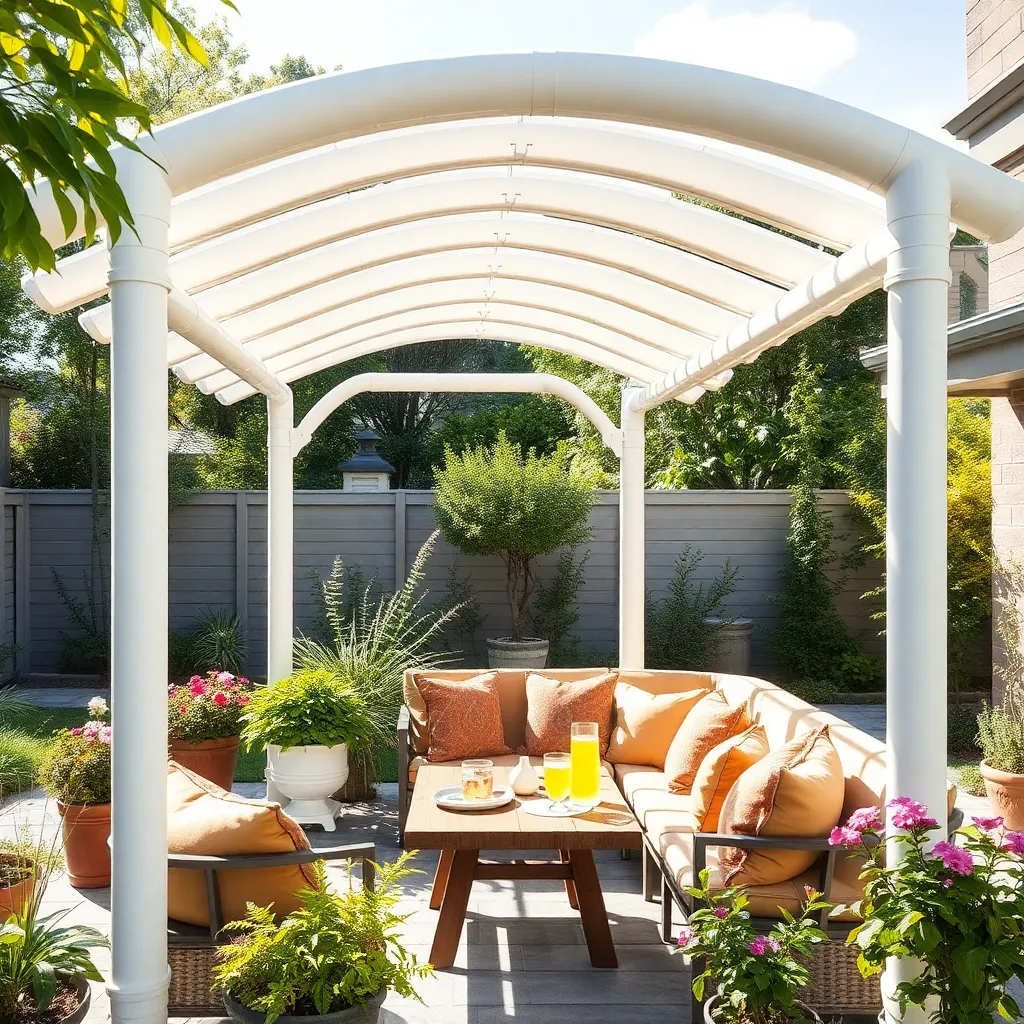
Using PVC pipes to construct a frame for your outdoor shelter is both cost-effective and adaptable. Begin by selecting schedule 40 PVC pipes, which are durable and ideal for structural purposes. Measure and cut the pipes to your desired dimensions, typically around 10 feet tall for a standard shelter. Assemble the framework by connecting the pipes with PVC fittings such as elbows and T-joints. This lightweight yet sturdy structure can be easily customized with additional sections or arches for enhanced stability and design.
For added functionality, consider covering your PVC frame with a UV-resistant tarp or fabric. Secure it tightly using bungee cords or zip ties, ensuring it’s taut to prevent water pooling. If you’re feeling creative, you can paint the pipes with weather-resistant spray paint to blend with your landscape. For advanced builders, adding features like curtain rods or hooks for hanging plants can turn this simple structure into a multifunctional outdoor space. With this versatile setup, you can quickly create a retreat suitable for various weather conditions and occasions.
Repurpose Old Doors for Walls
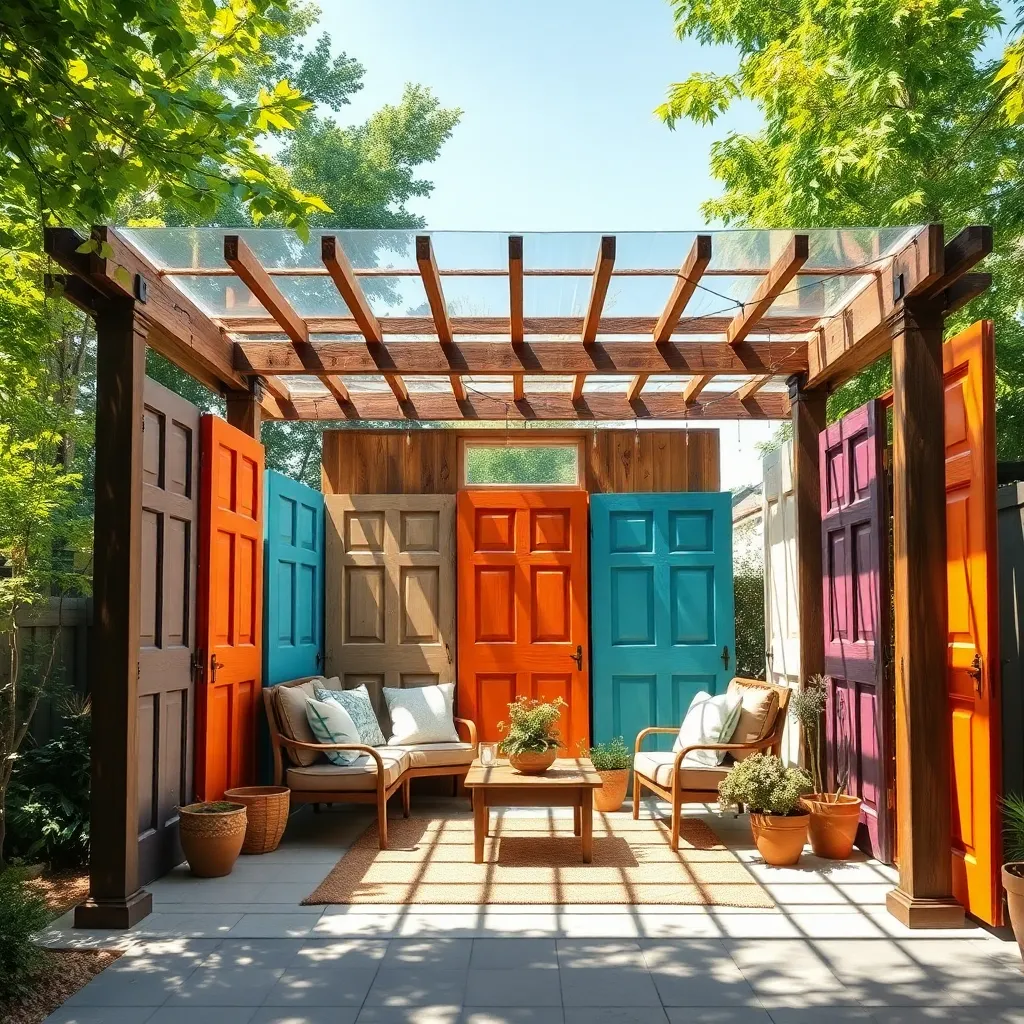
Repurposing old doors for walls is a fantastic way to create a unique and budget-friendly outdoor shelter. Start by sourcing solid wood or composite doors, ensuring they are in good condition to withstand the elements. Arrange the doors vertically or horizontally, depending on your desired style, and secure them with sturdy hinges or brackets to a simple wooden frame. Ensure stability by anchoring the frame into the ground with metal stakes or concrete footings, especially if your area experiences strong winds.
For a more personalized touch, consider painting the doors in vibrant colors or using weatherproof stains to enhance their natural grain. Advanced DIYers might add shelves or hooks to the doors for extra functionality, turning your shelter into a multi-purpose space. To prevent moisture damage, apply a sealant to the doors’ edges and joints, and if using glass-paneled doors, make sure the glass is tempered for safety. This repurposing project not only adds charm to your garden but also promotes sustainability by giving old materials new life.
Build a Recycled Window Greenhouse
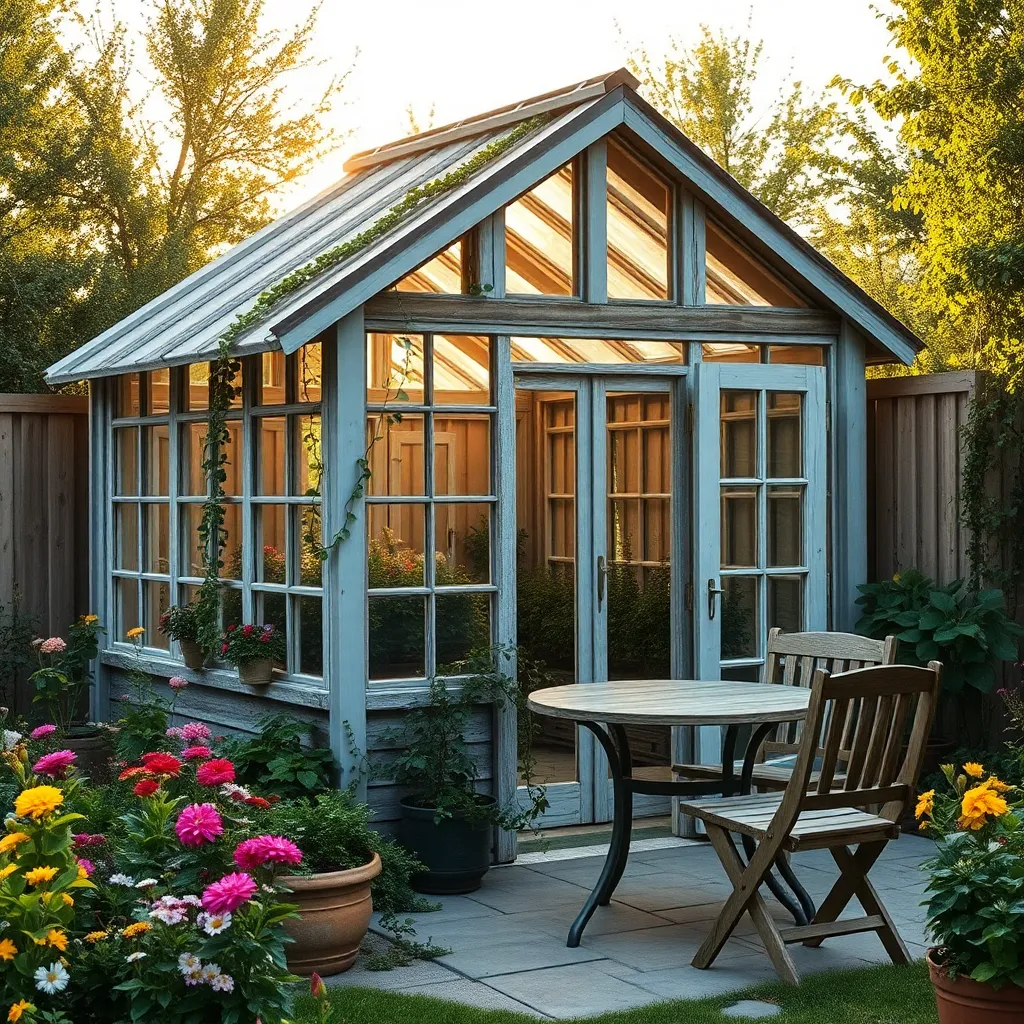
Transforming old windows into a greenhouse is an excellent way to create a unique and functional outdoor space while recycling materials. Start by collecting windows of similar heights to ensure a uniform look and stable construction. Arrange them to form the walls, securing them with sturdy frames made from 2×4 lumber. Use silicone sealant to fill gaps between windows, protecting plants from drafts and ensuring energy efficiency. Aligning windows along a south-facing wall maximizes sunlight exposure, promoting plant growth and warmth.
For the roof, consider using clear polycarbonate panels, which are lightweight and provide excellent insulation. Ensure the roof has a slight slope to allow rainwater runoff, preventing leaks. Add ventilation by installing a window that can open or a roof vent, maintaining airflow and regulating temperature. For those with advanced skills, incorporating a small, solar-powered fan can enhance ventilation. This greenhouse not only offers a sustainable gardening solution but also adds character and charm to any backyard.
Stitch Together a Canvas Teepee
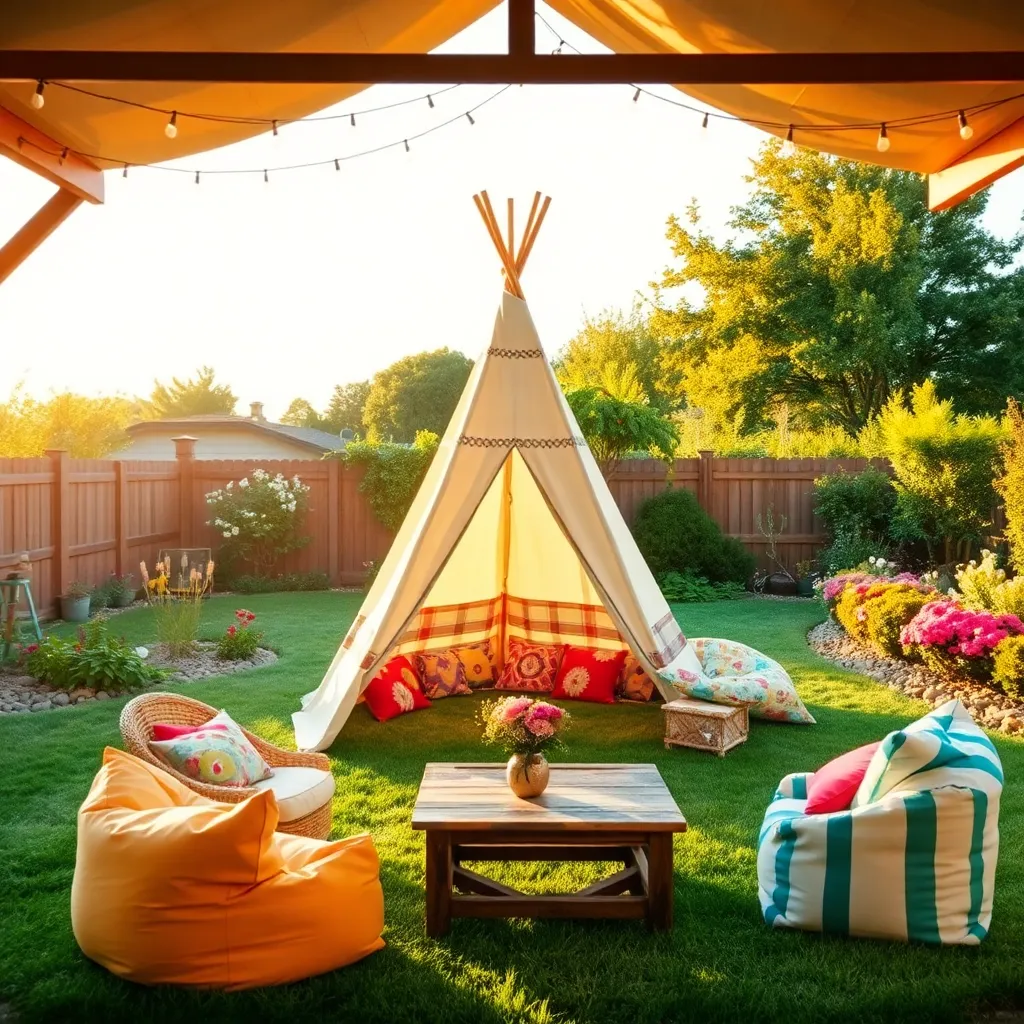
To create a cozy and rustic canvas teepee that blends seamlessly into your outdoor space, start by selecting a durable, weather-resistant canvas. You’ll need approximately 15 to 20 feet of fabric, depending on your desired size. Cut the canvas into panels, each one measuring about 6 feet in width and 8 feet in height. Sew these panels together using a strong, weather-resistant thread, leaving an opening for the entrance. For the frame, use sturdy poles made from materials like bamboo or lightweight wood, each about 8 feet long, to form a stable tripod structure.
Position your poles in a circular pattern and securely tie them at the top with heavy-duty rope, ensuring they are evenly spaced to support the canvas. Wrap the stitched canvas around the frame, and secure it at the bottom with stakes to keep it taut. For added comfort, consider adding a waterproof groundsheet or rugs inside. Advanced tip: if you want to enhance stability and aesthetics, paint or stencil designs on the canvas before assembly. This DIY teepee provides not only shelter but also a charming focal point in your garden or backyard.
Construct a Branch and Vine Arbor
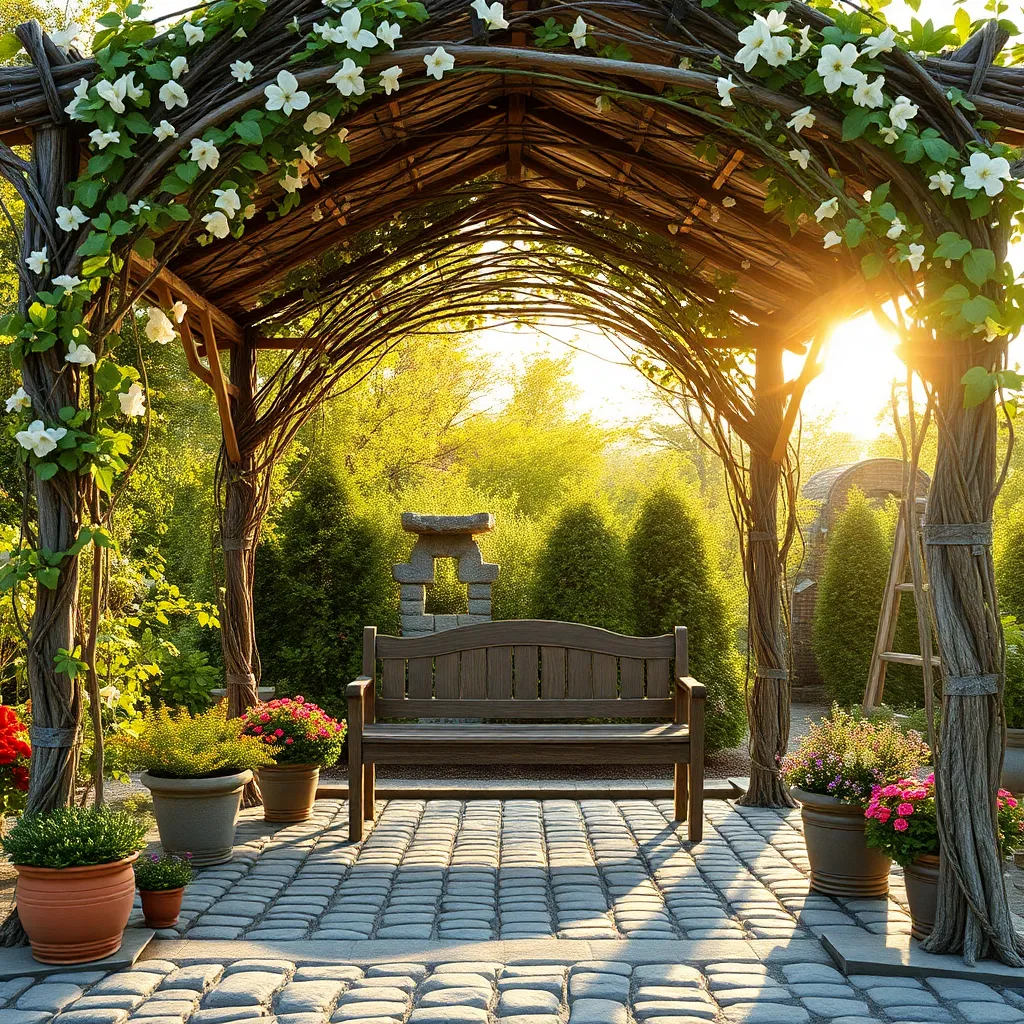
To create a charming and natural outdoor feature, consider constructing a branch and vine arbor. Start by gathering sturdy branches, such as oak or cedar, for the framework. Ensure they are at least 8 feet long and 2 to 3 inches thick for stability. Arrange them in an arch shape and secure the ends deeply into the ground for support. For a beginner-friendly approach, use zip ties or natural jute twine to bind the intersections of the branches securely. This rustic structure will serve as a perfect base for climbing plants like wisteria or honeysuckle.
For a more advanced touch, enhance your arbor with a trellis made of wire mesh or lattice panels attached to the sides, offering additional support for vining plants. Choose vines that thrive in your climate for the best results, and plant them at the base of the arbor, training them to grow upward through the framework. This not only adds an enchanting, shaded area to your garden but also supports biodiversity by providing habitat for pollinators and birds. With time, your branch and vine arbor will integrate seamlessly into the surrounding landscape, creating a serene and picturesque retreat.
Set Up a Budget-Friendly Pop-Up Tent
Setting up a budget-friendly pop-up tent is a fantastic way to create an instant outdoor shelter without breaking the bank. When choosing a tent, look for one made from durable, weather-resistant materials like polyester or nylon, ensuring it can withstand various weather conditions. Opt for a tent with a simple, tool-free assembly to make setup quick and effortless. A 10×10-foot model is versatile for small gatherings or a cozy outdoor reading nook. For beginners, remember to secure the tent with stakes or sandbags, especially in windy conditions.
For a personalized touch, consider adding some stylish elements to your pop-up tent. String lights or fabric drapes can transform your tent into a charming retreat. If you’re comfortable with basic DIY projects, you can sew your own custom side panels using outdoor fabric to match your garden’s color scheme. This not only adds aesthetic value but also provides additional privacy and sun protection. By focusing on these small enhancements, you can elevate the look of your pop-up tent while keeping your budget intact.
Conclusion: Creating Beautiful Outdoor Spaces
In exploring the 15 affordable outdoor shelter ideas you can DIY, we’ve discovered a treasure trove of ways to enhance not only your outdoor space but also your relationships. From creating cozy garden retreats to building intimate pergolas, each project offers an opportunity to foster connection, communication, and shared experiences. Whether it’s working together on a weekend project or enjoying a quiet afternoon under your new gazebo, these ideas are designed to bring you closer to your loved ones without breaking the bank.
To start transforming your backyard into a relationship haven, pick one idea that resonates with you and set aside time this weekend to begin. Remember, the process is just as meaningful as the outcome, offering moments of collaboration and joy.
Don’t let these inspiring ideas slip away—bookmark this article now for easy access whenever you’re ready to tackle the next project. As you invest time and creativity into your outdoor spaces, you’ll find that these efforts pay off in stronger, more fulfilling relationships. Together, let’s build not just shelters, but bonds that stand the test of time.